
WESTPORT · REFINISHING & INSTALLATION
A new chapter.
The same home.
Main-floor Brazilian cherry, refinished. Upstairs carpet, replaced with engineered hardwood. Stairs, handrails and nosings, coordinated as part of the transformation.
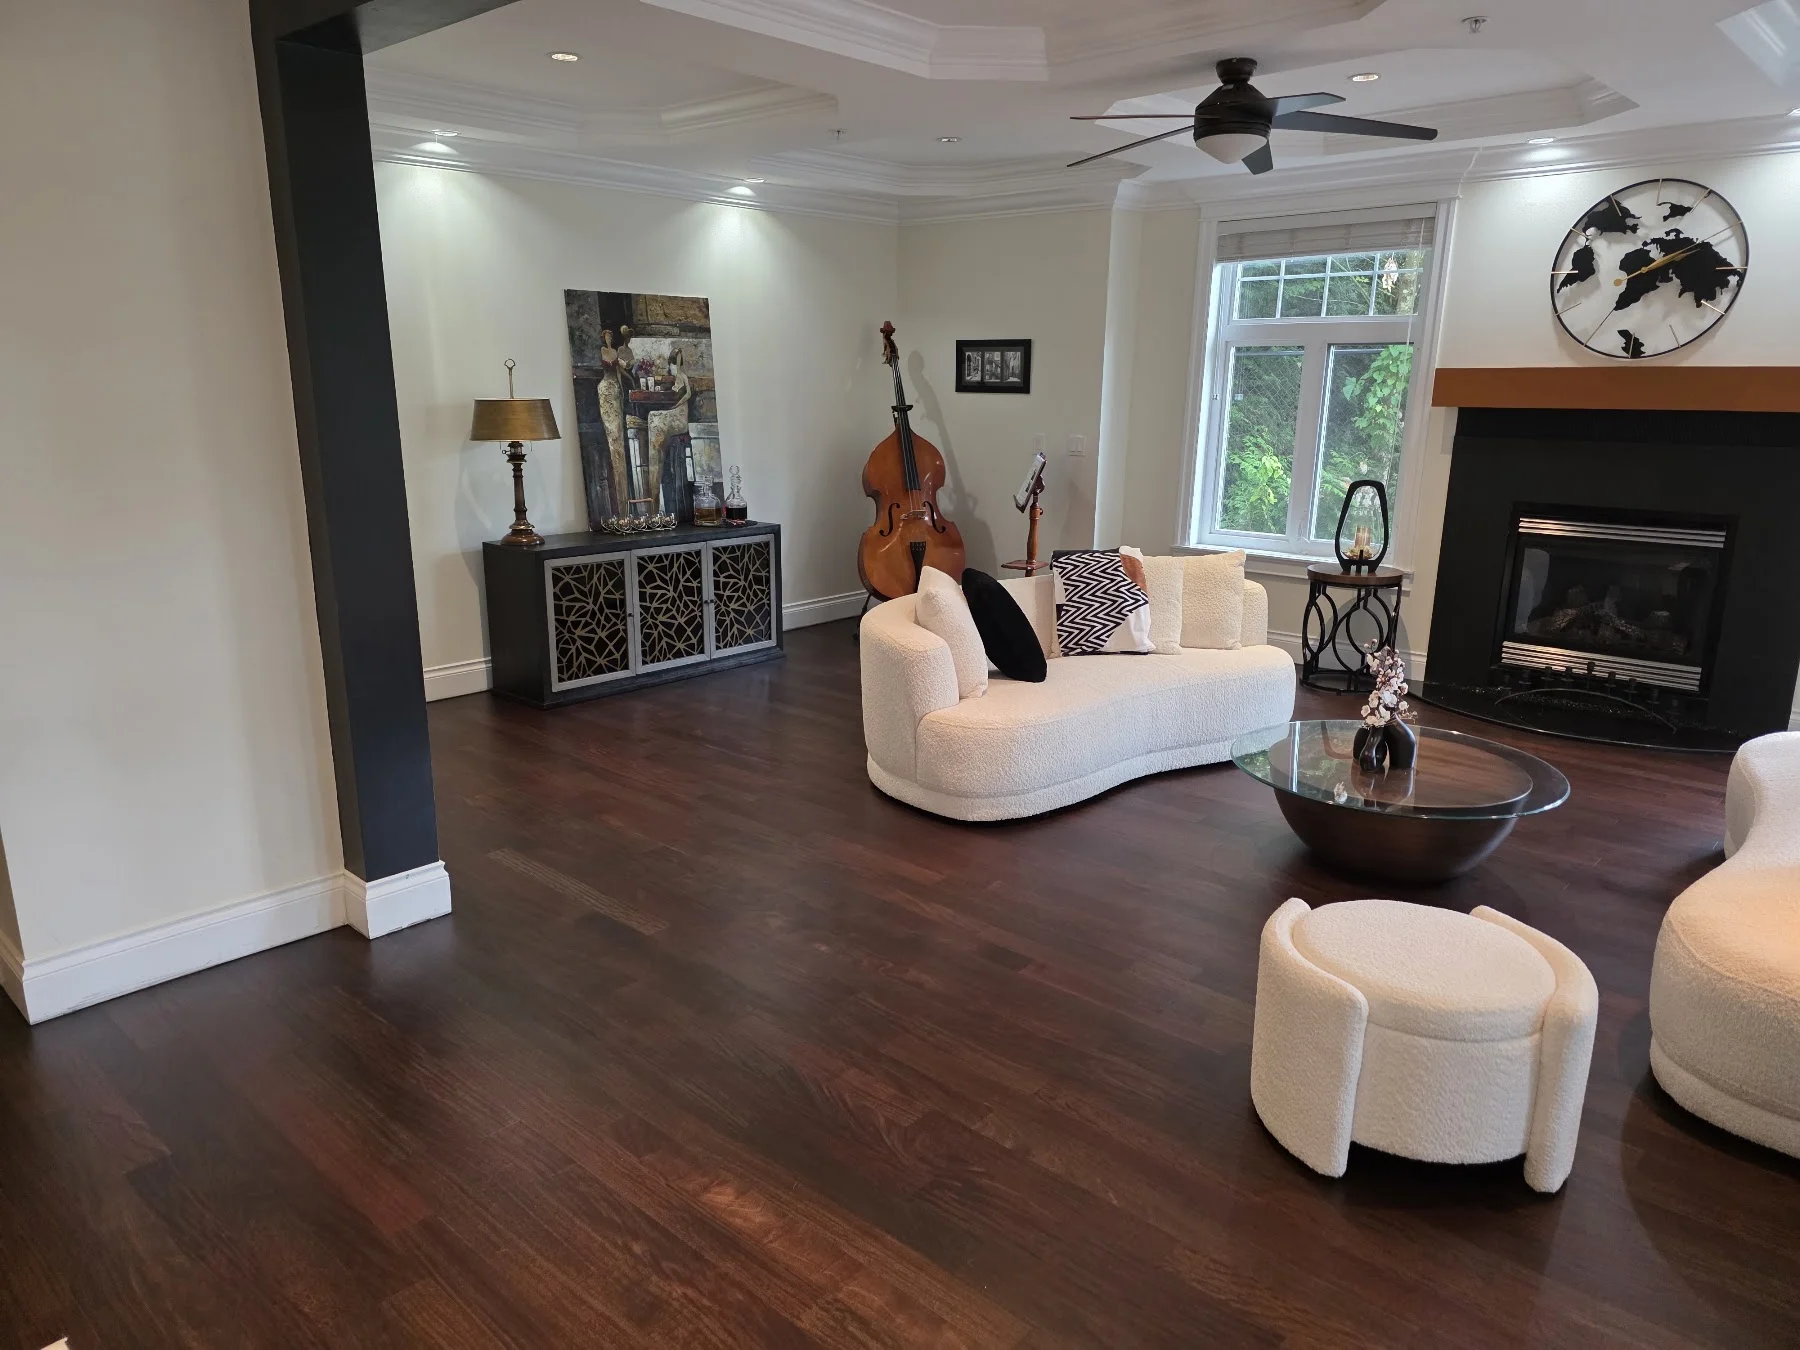
THE FINISHED MAIN FLOOR
Warmth through
every room.
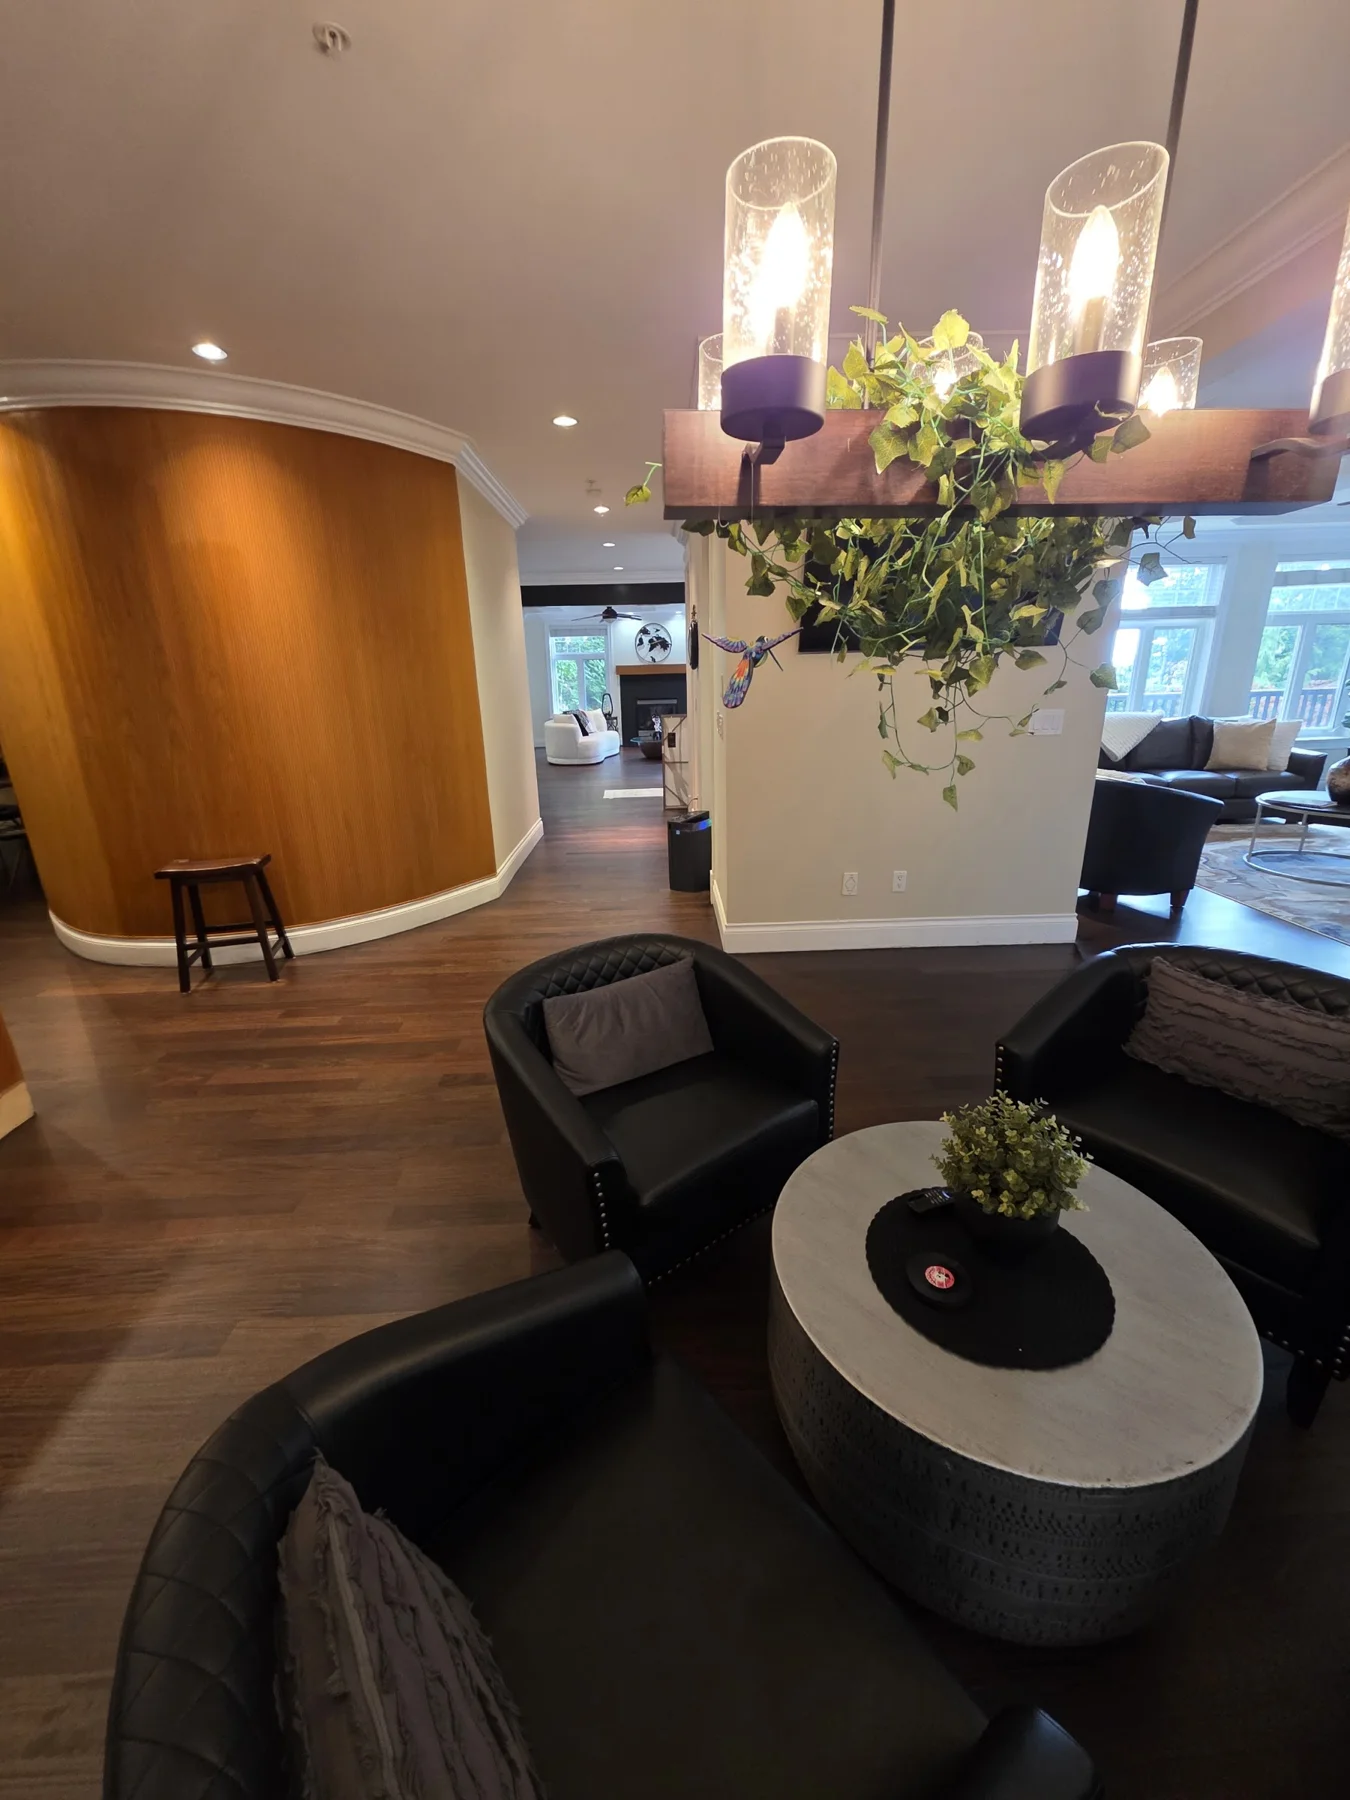
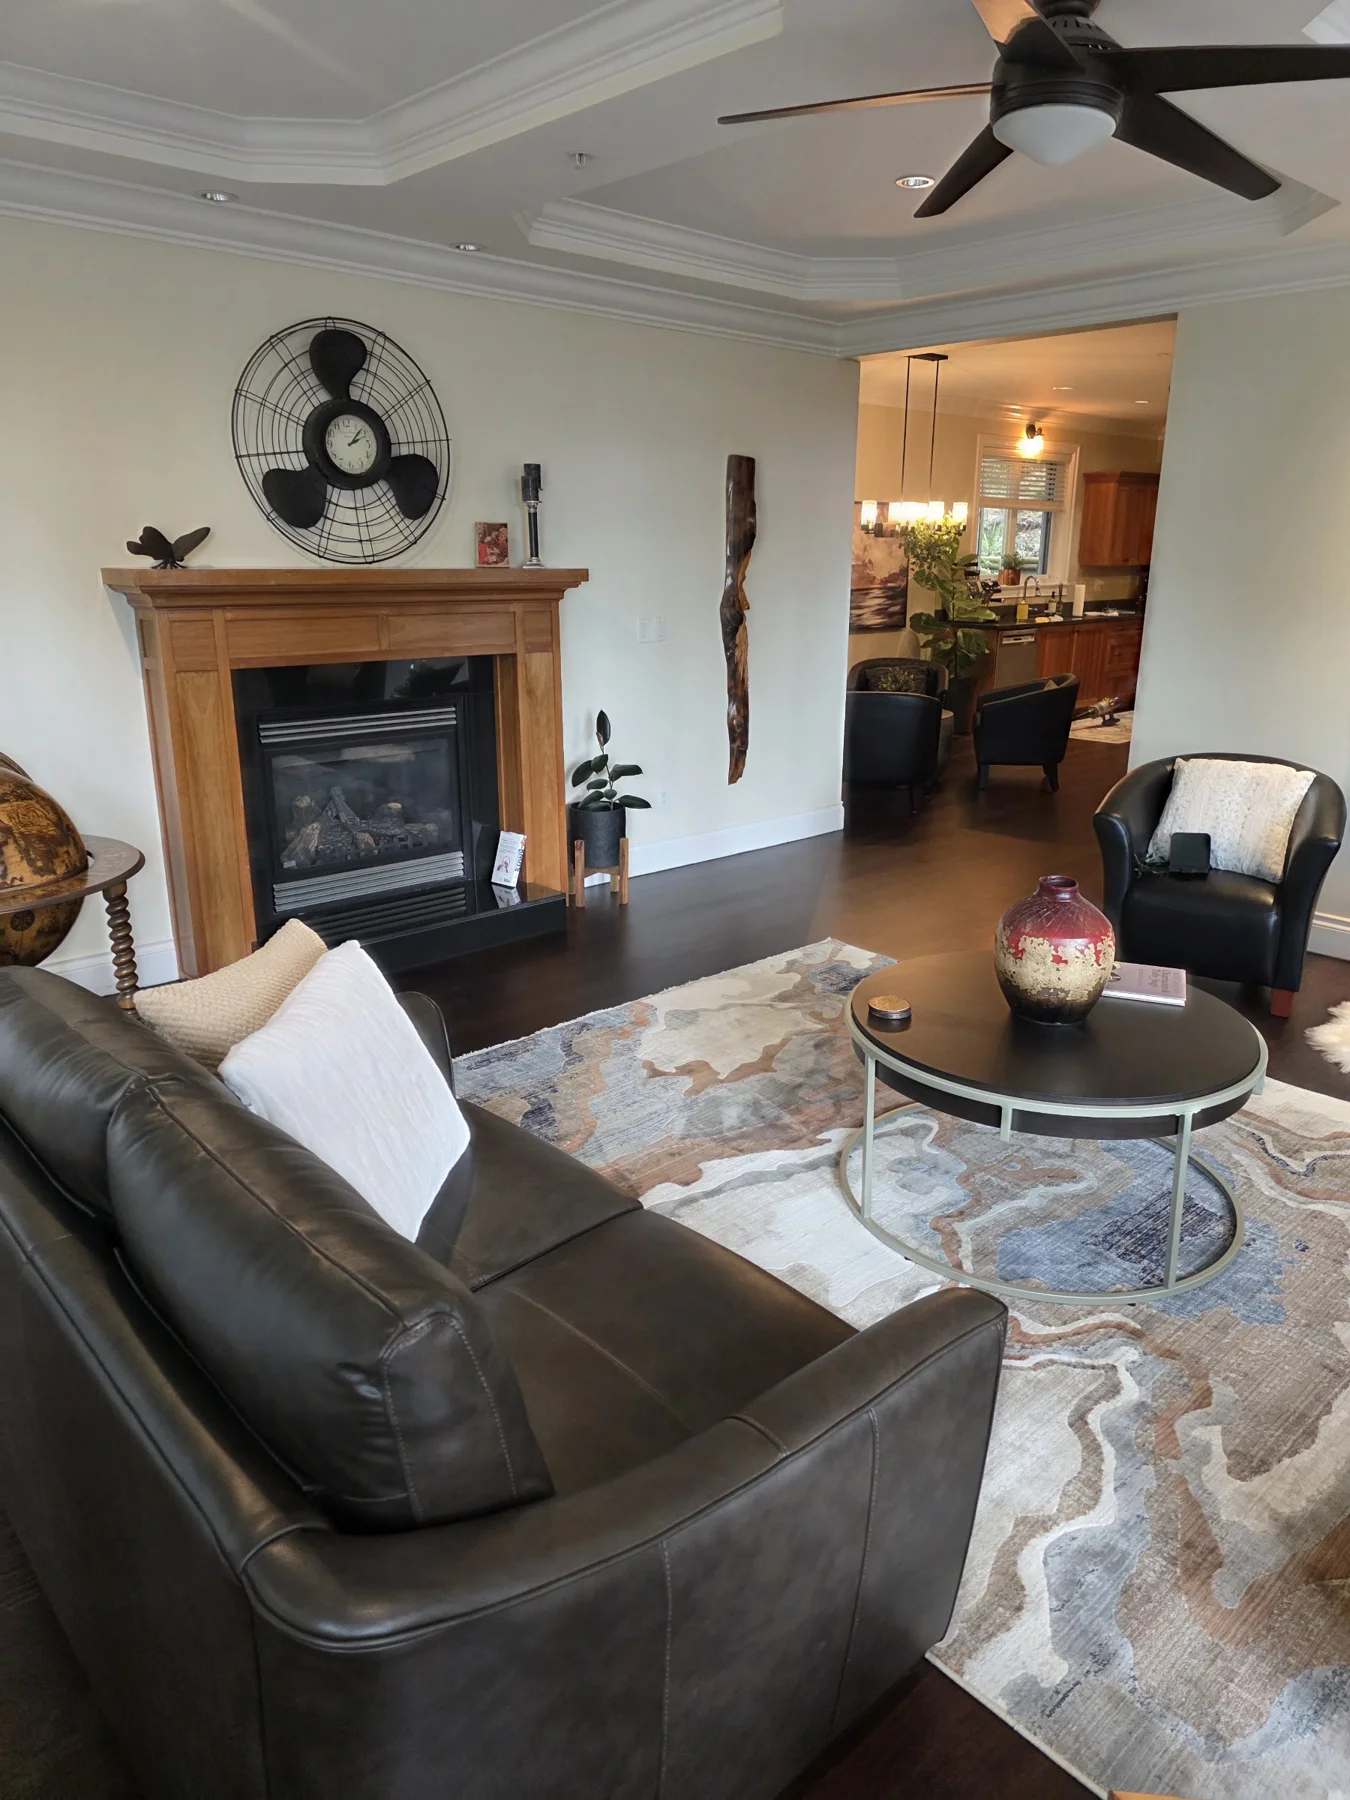
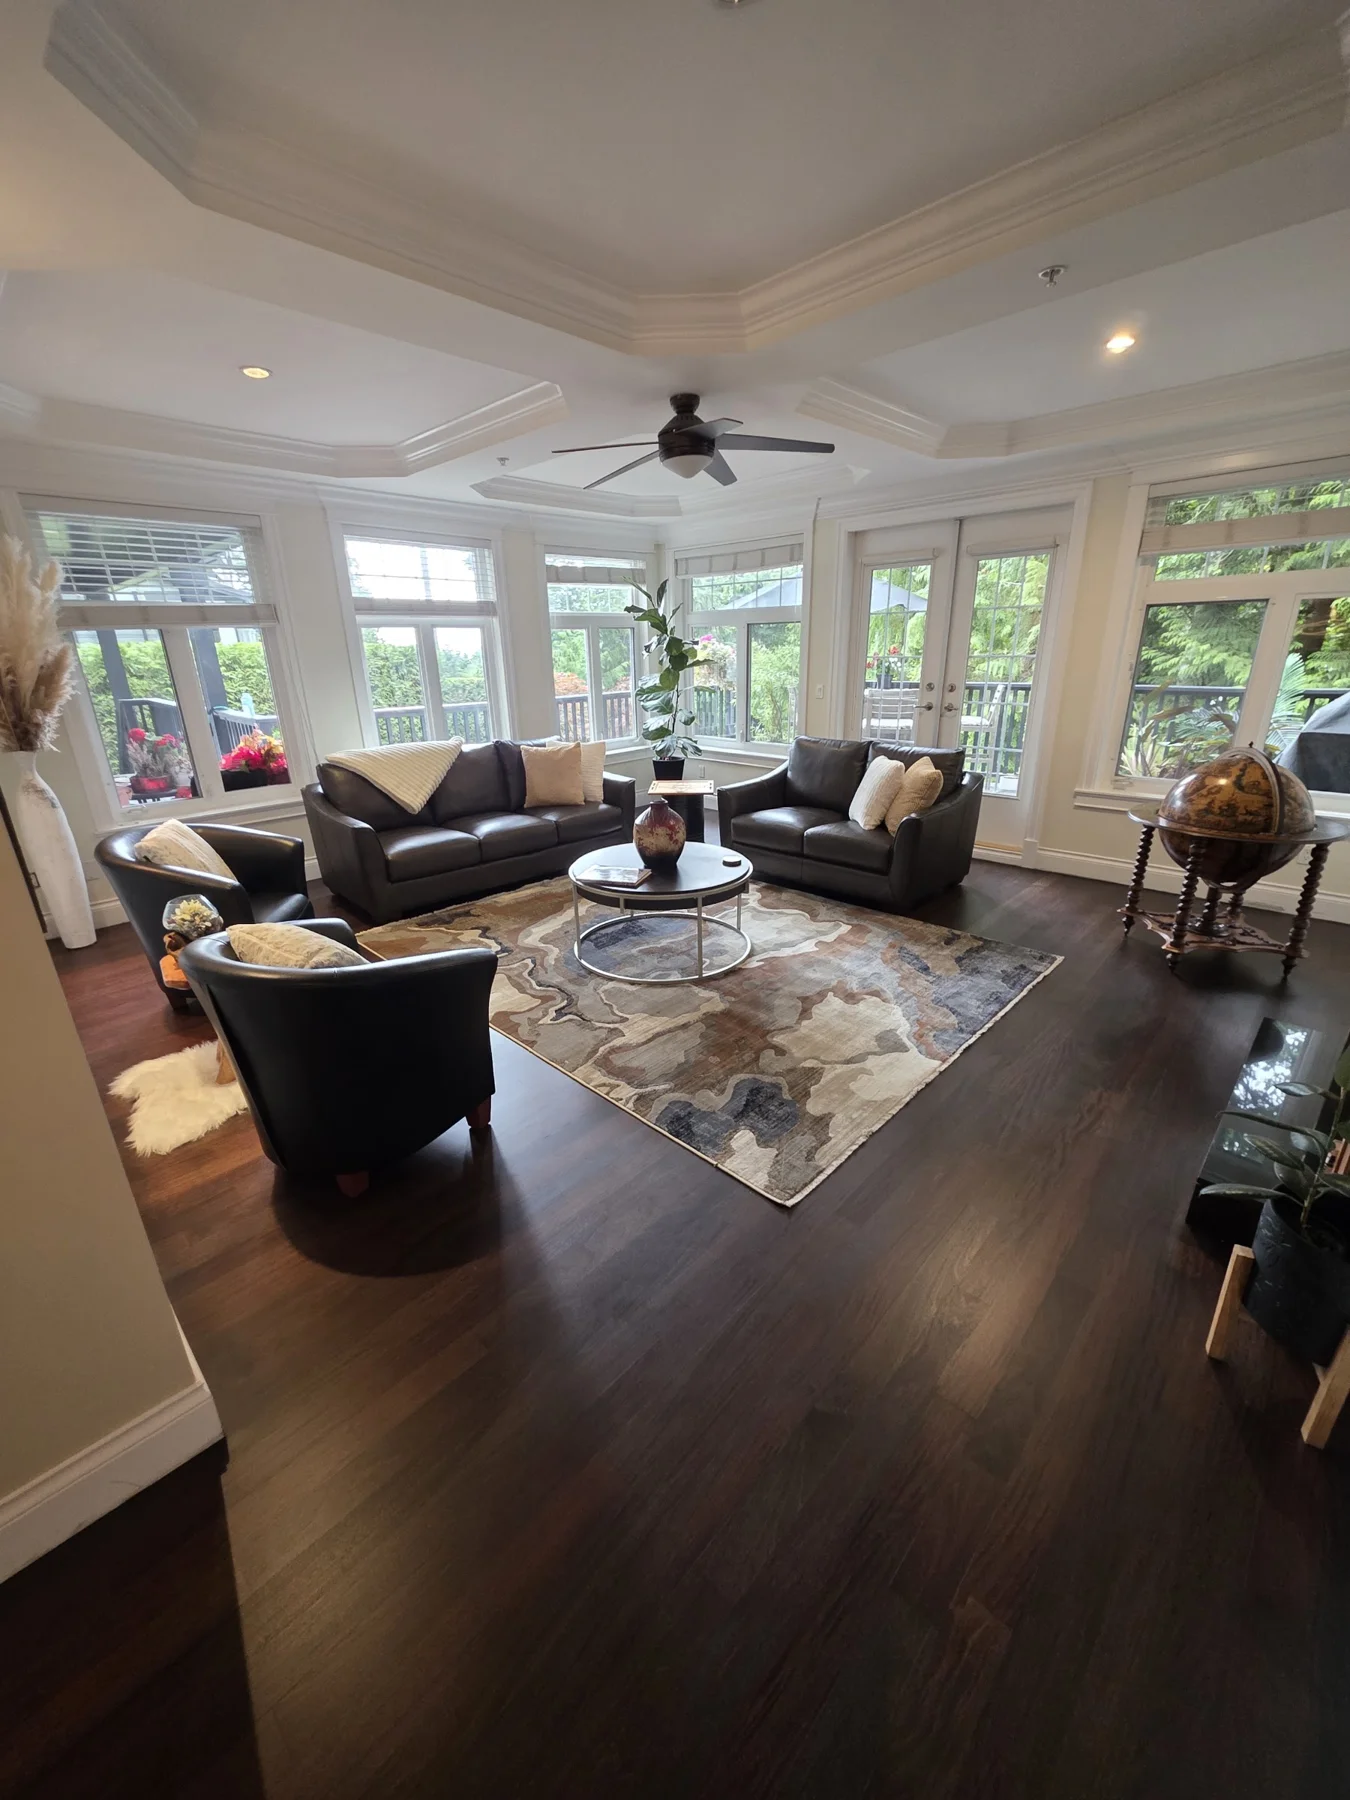
The deeper finish carries through the sitting room, dining space and kitchen, bringing the existing hardwood into a new chapter of the home.
01 / MAIN FLOOR · REFINISHING
Same wood.
A deeper warmth.
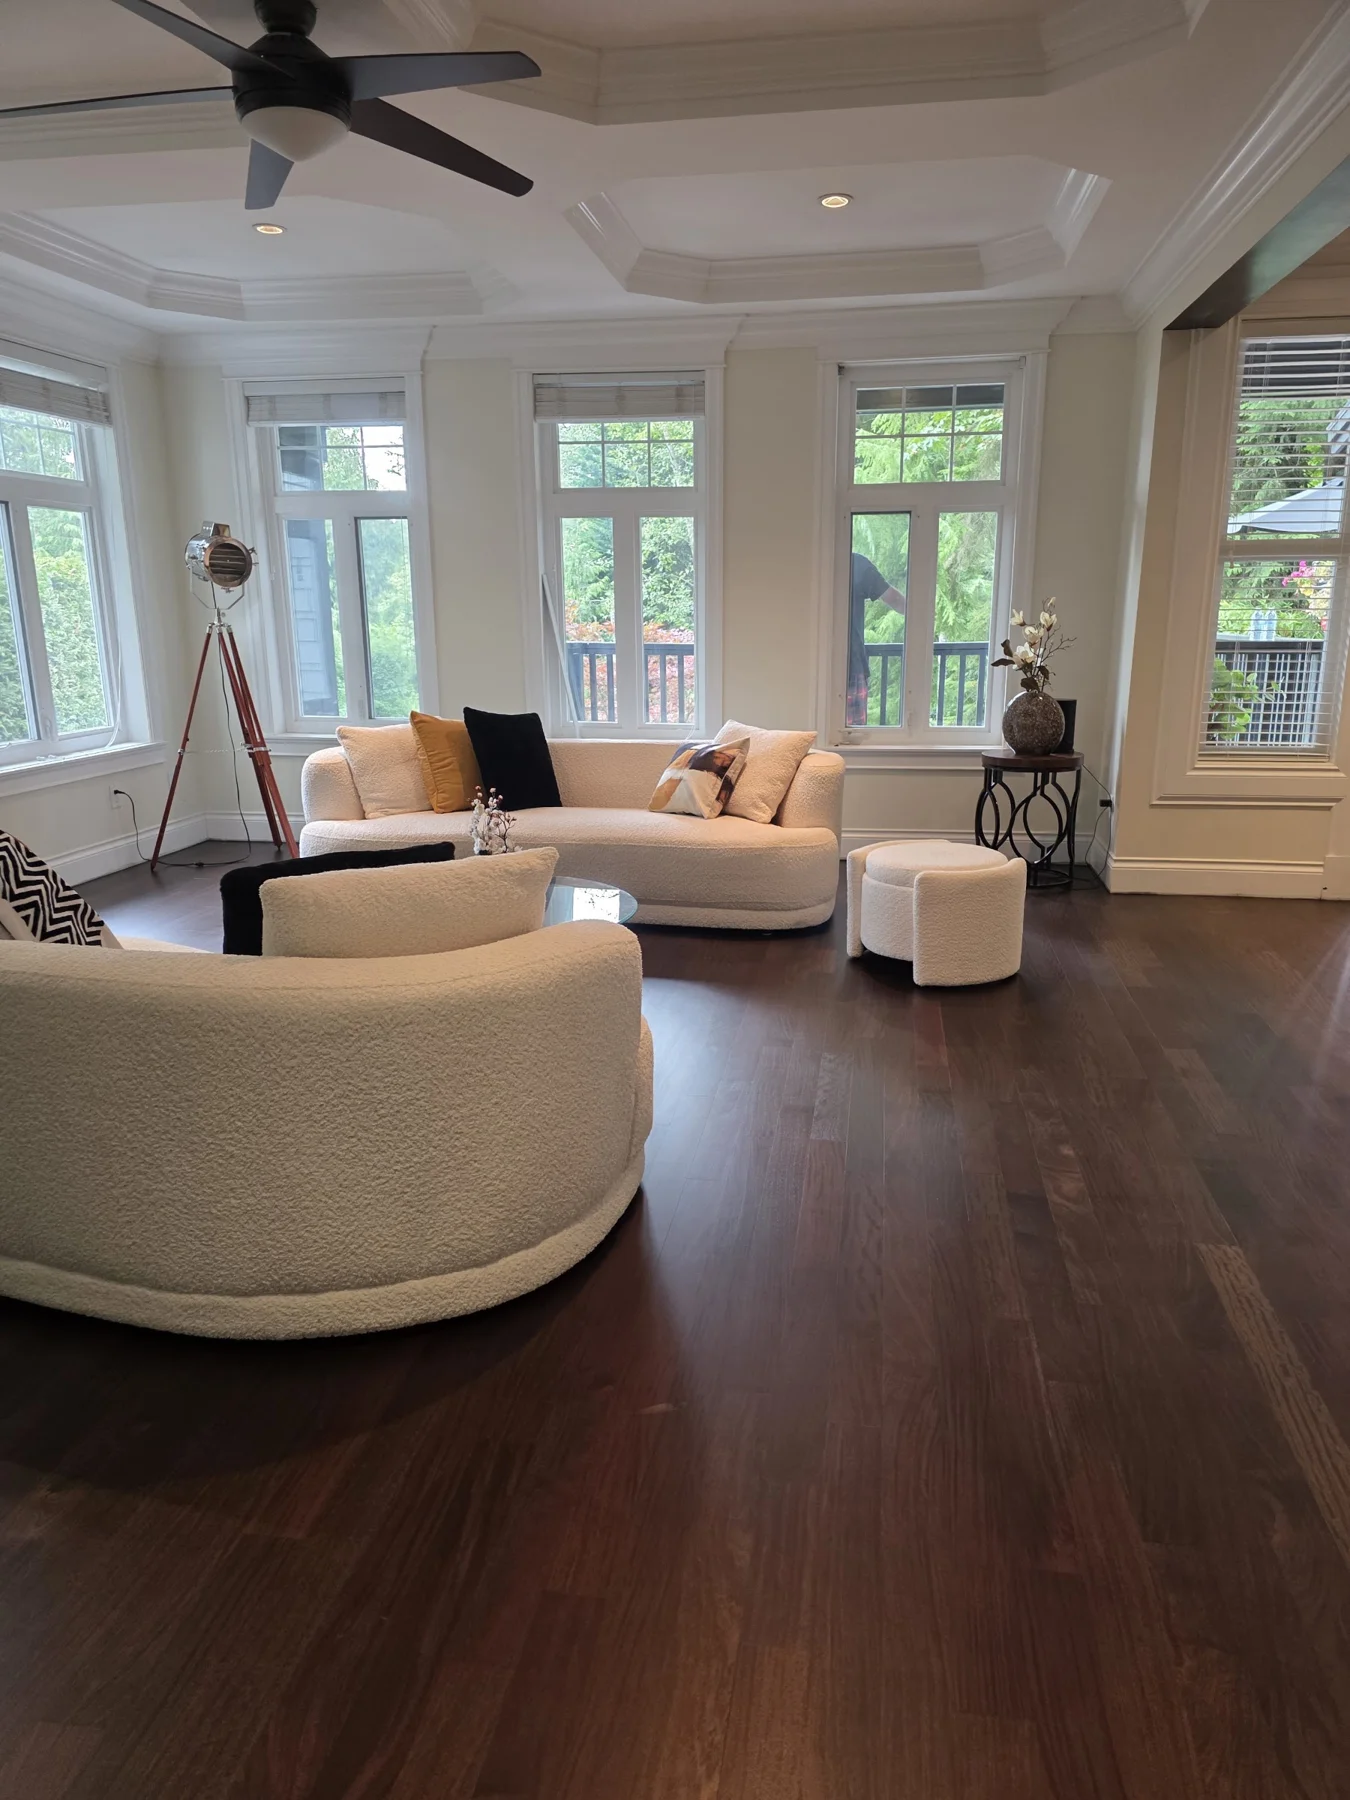
The main-floor Brazilian cherry was retained, sanded and refinished in a darker tone. The grain and character remain; the change is in how the original floor feels within the home.
BEFORE · MAIN FLOOR
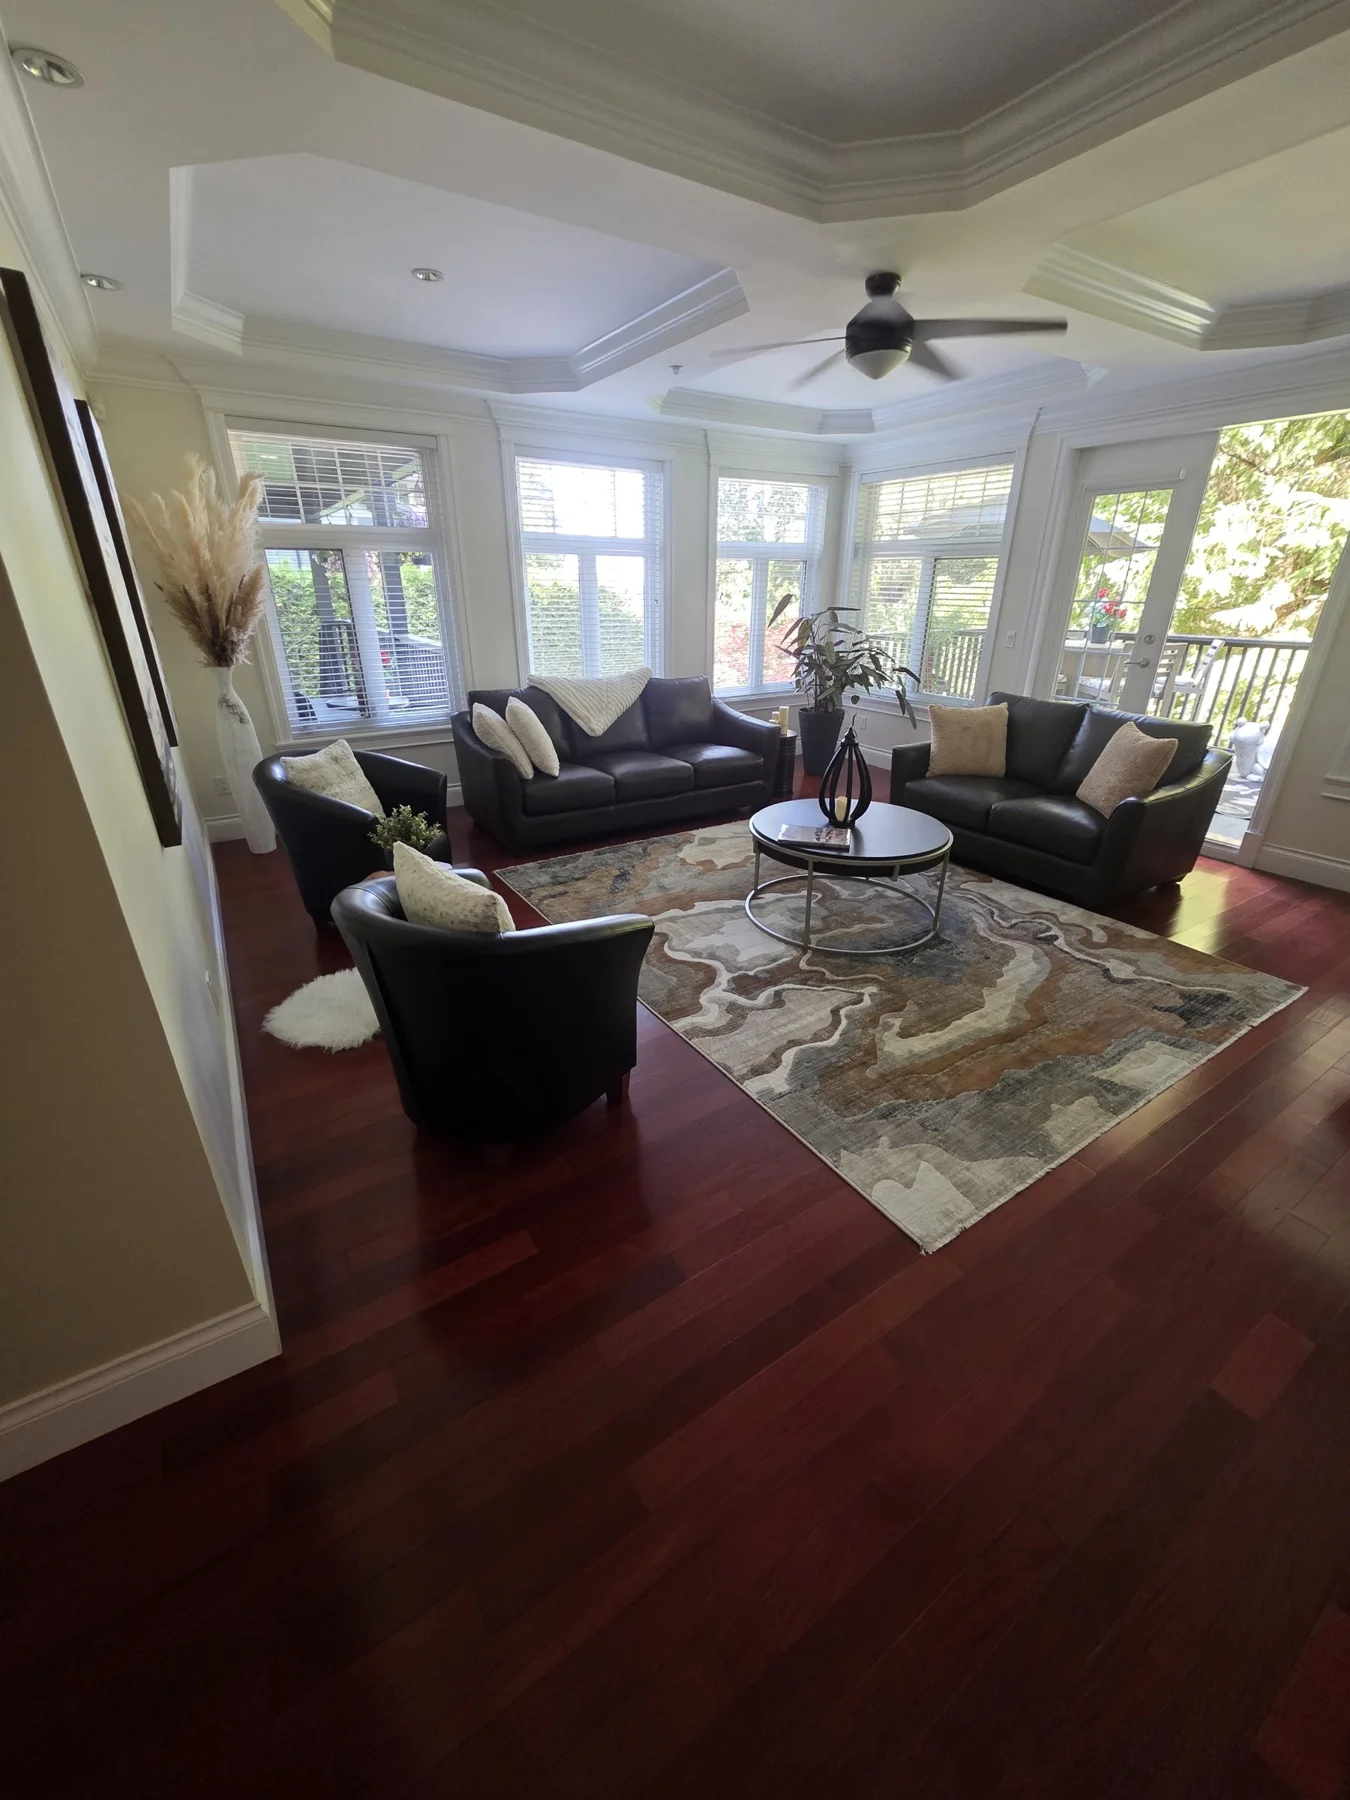
AFTER · MAIN FLOOR
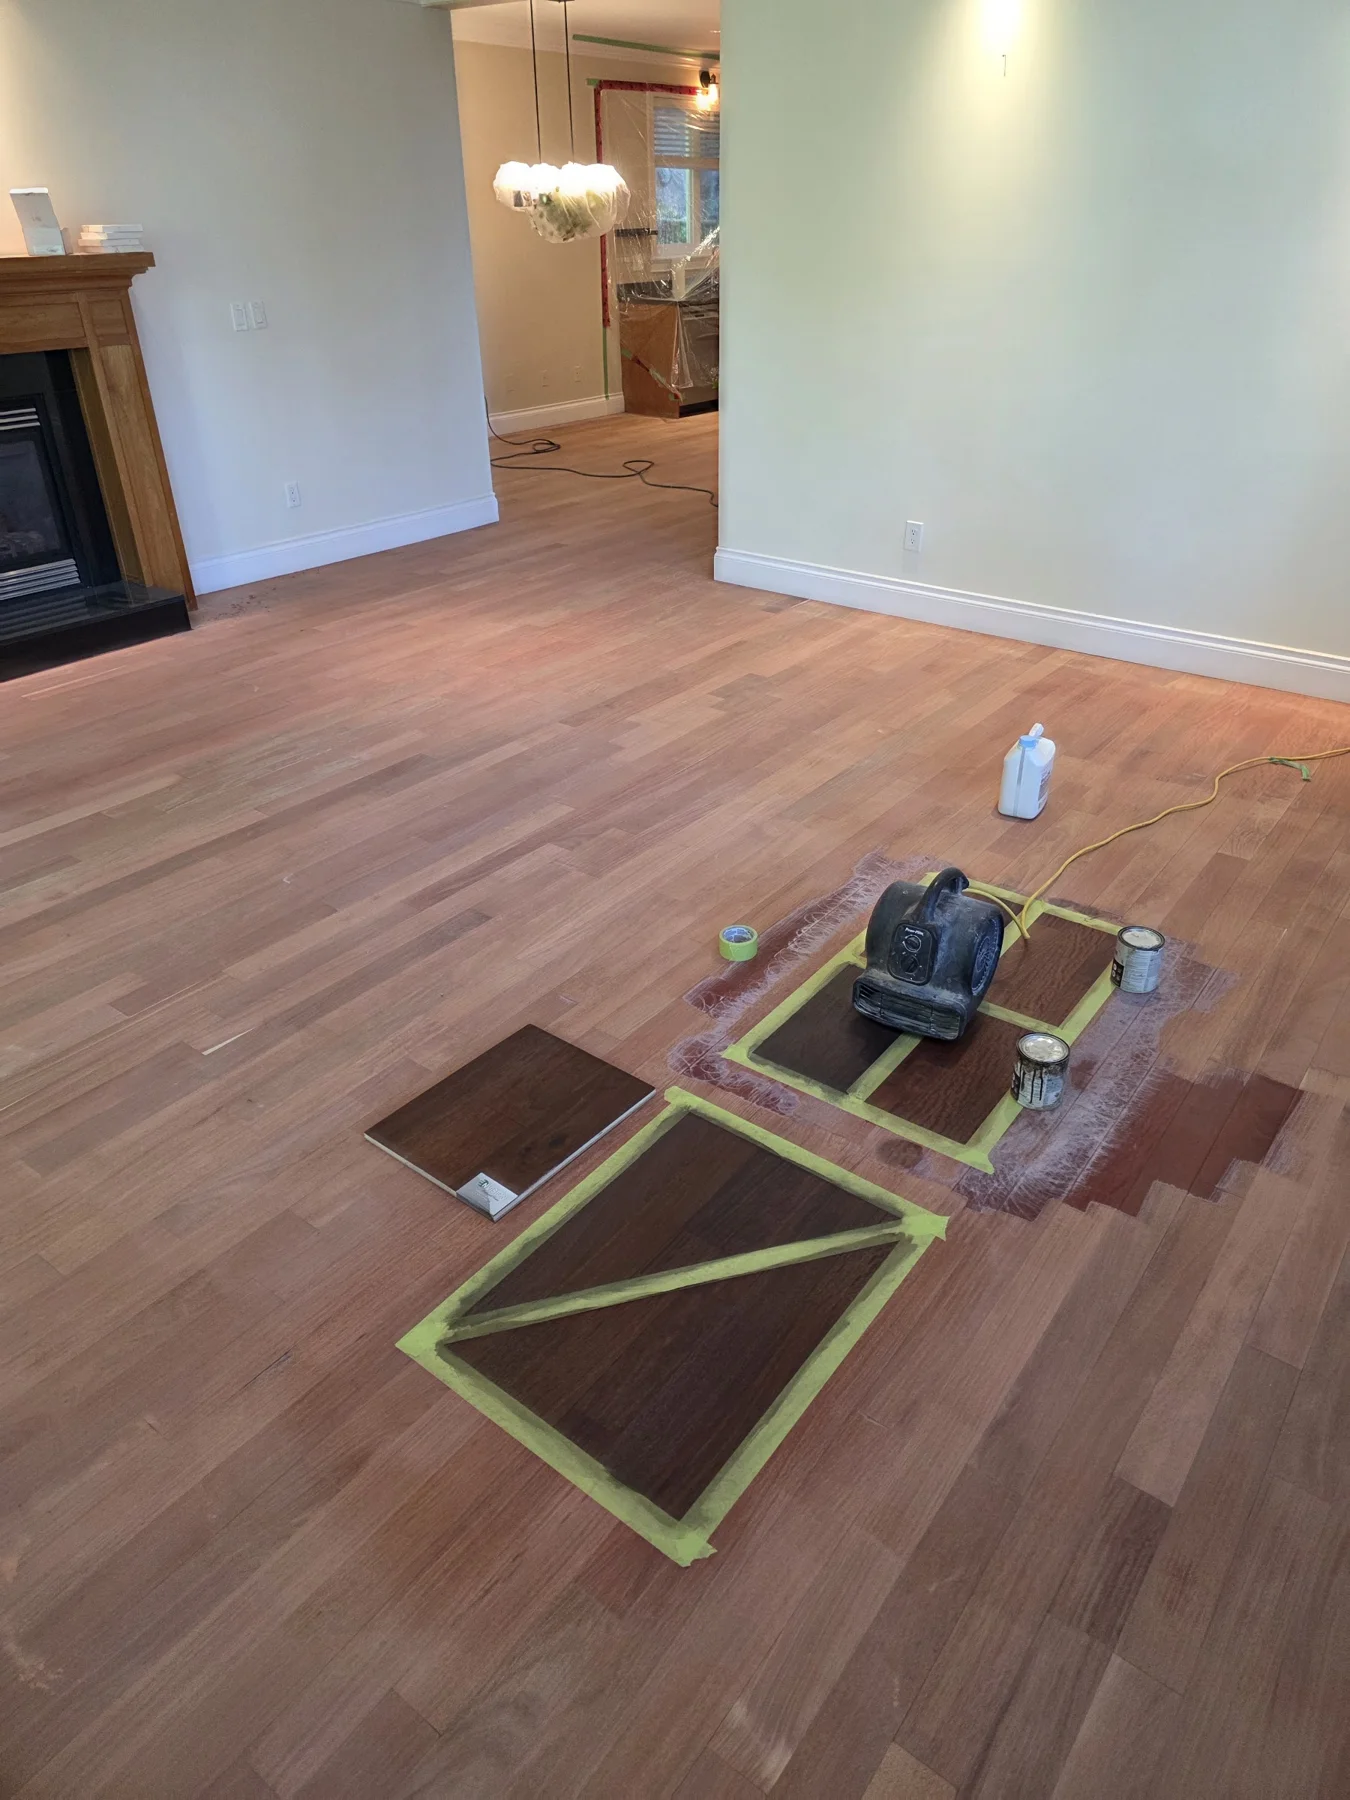
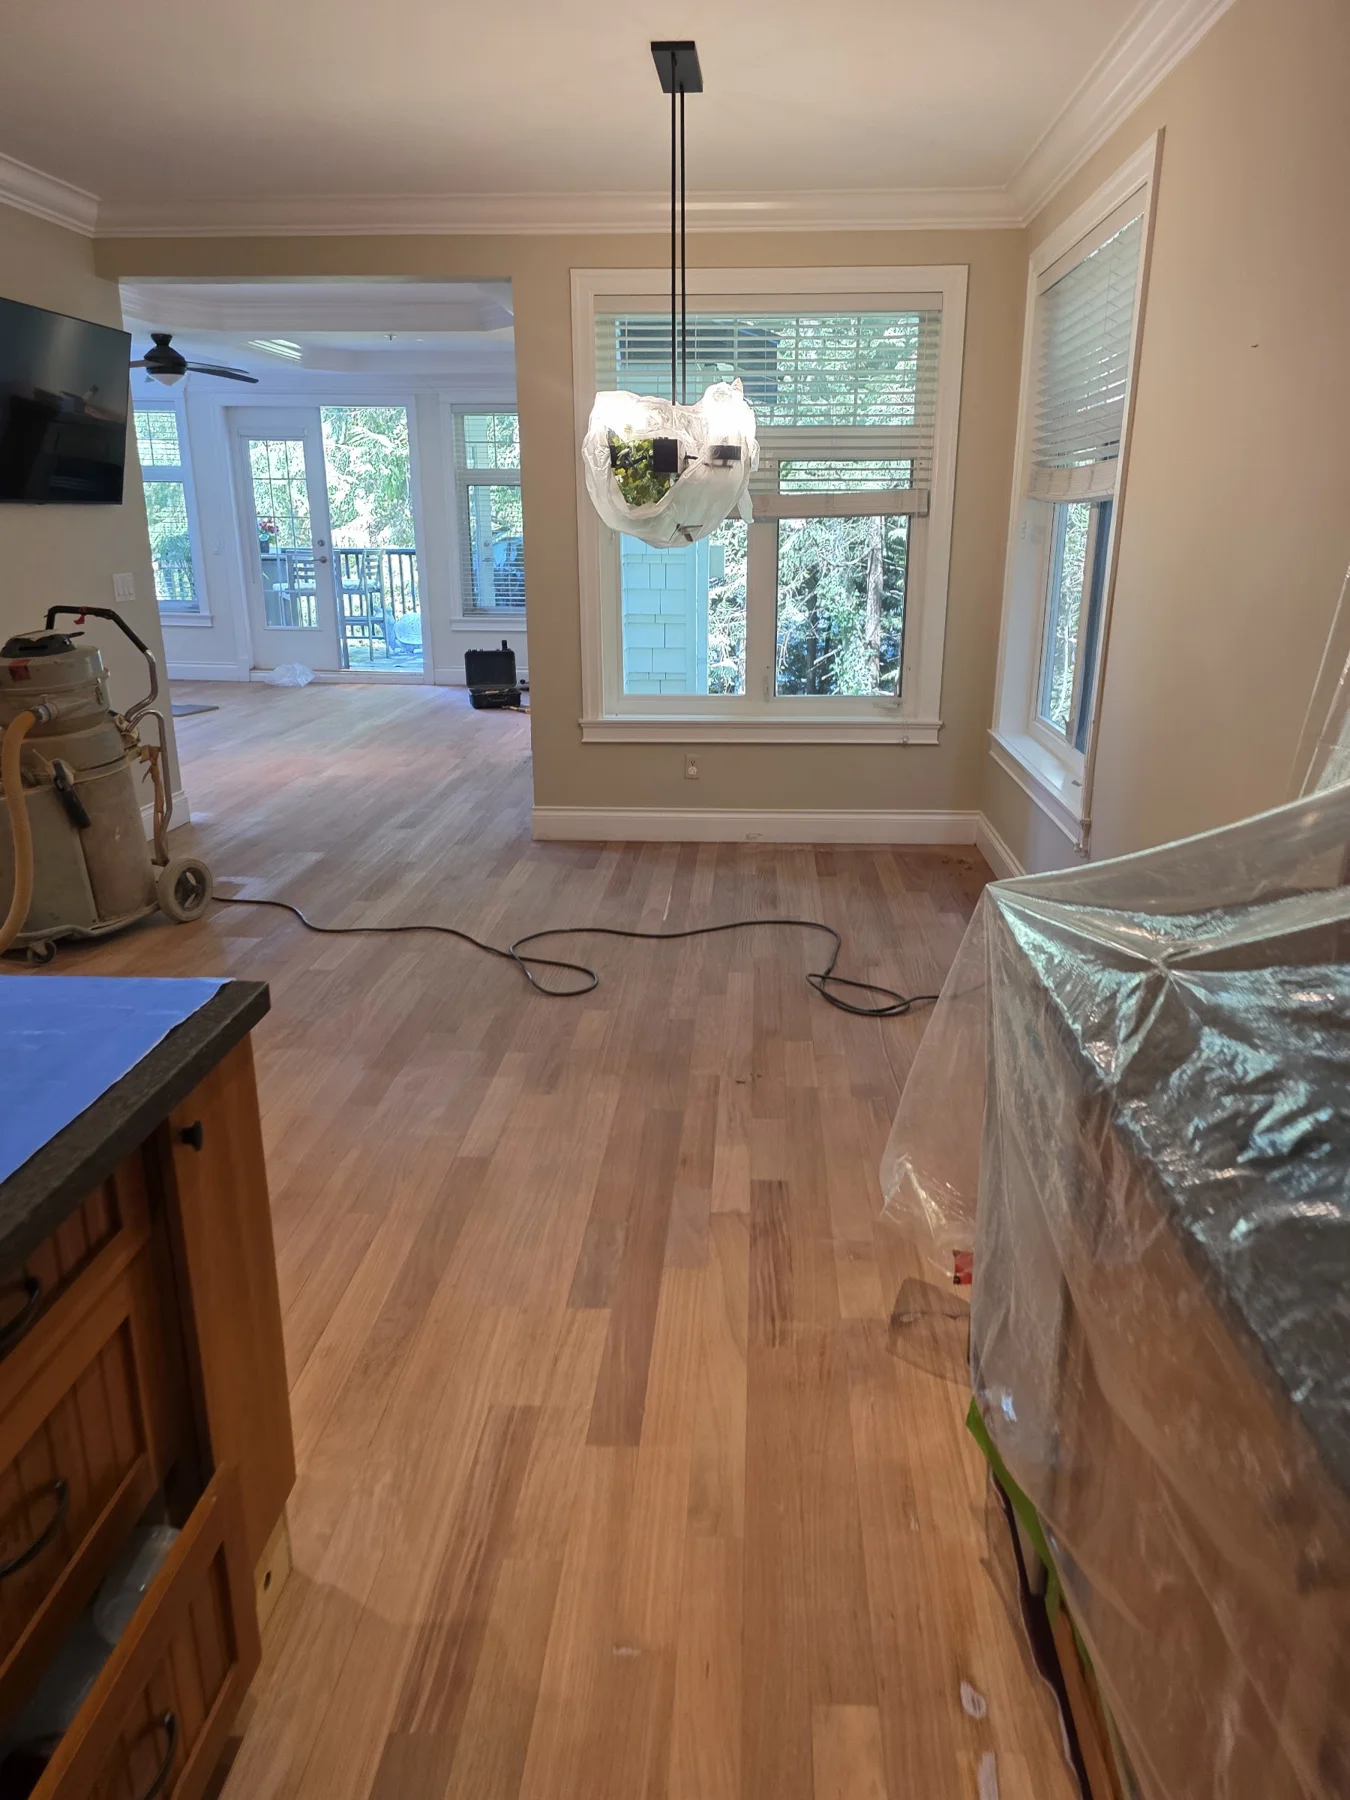
How we chose the finish · View stain samples and sanding
Samples tested on the existing Brazilian cherry helped establish the darker direction alongside the new upstairs flooring. The sanded dining-area floor shows the timber before the new finish.
02 / UPSTAIRS · NEW HARDWOOD
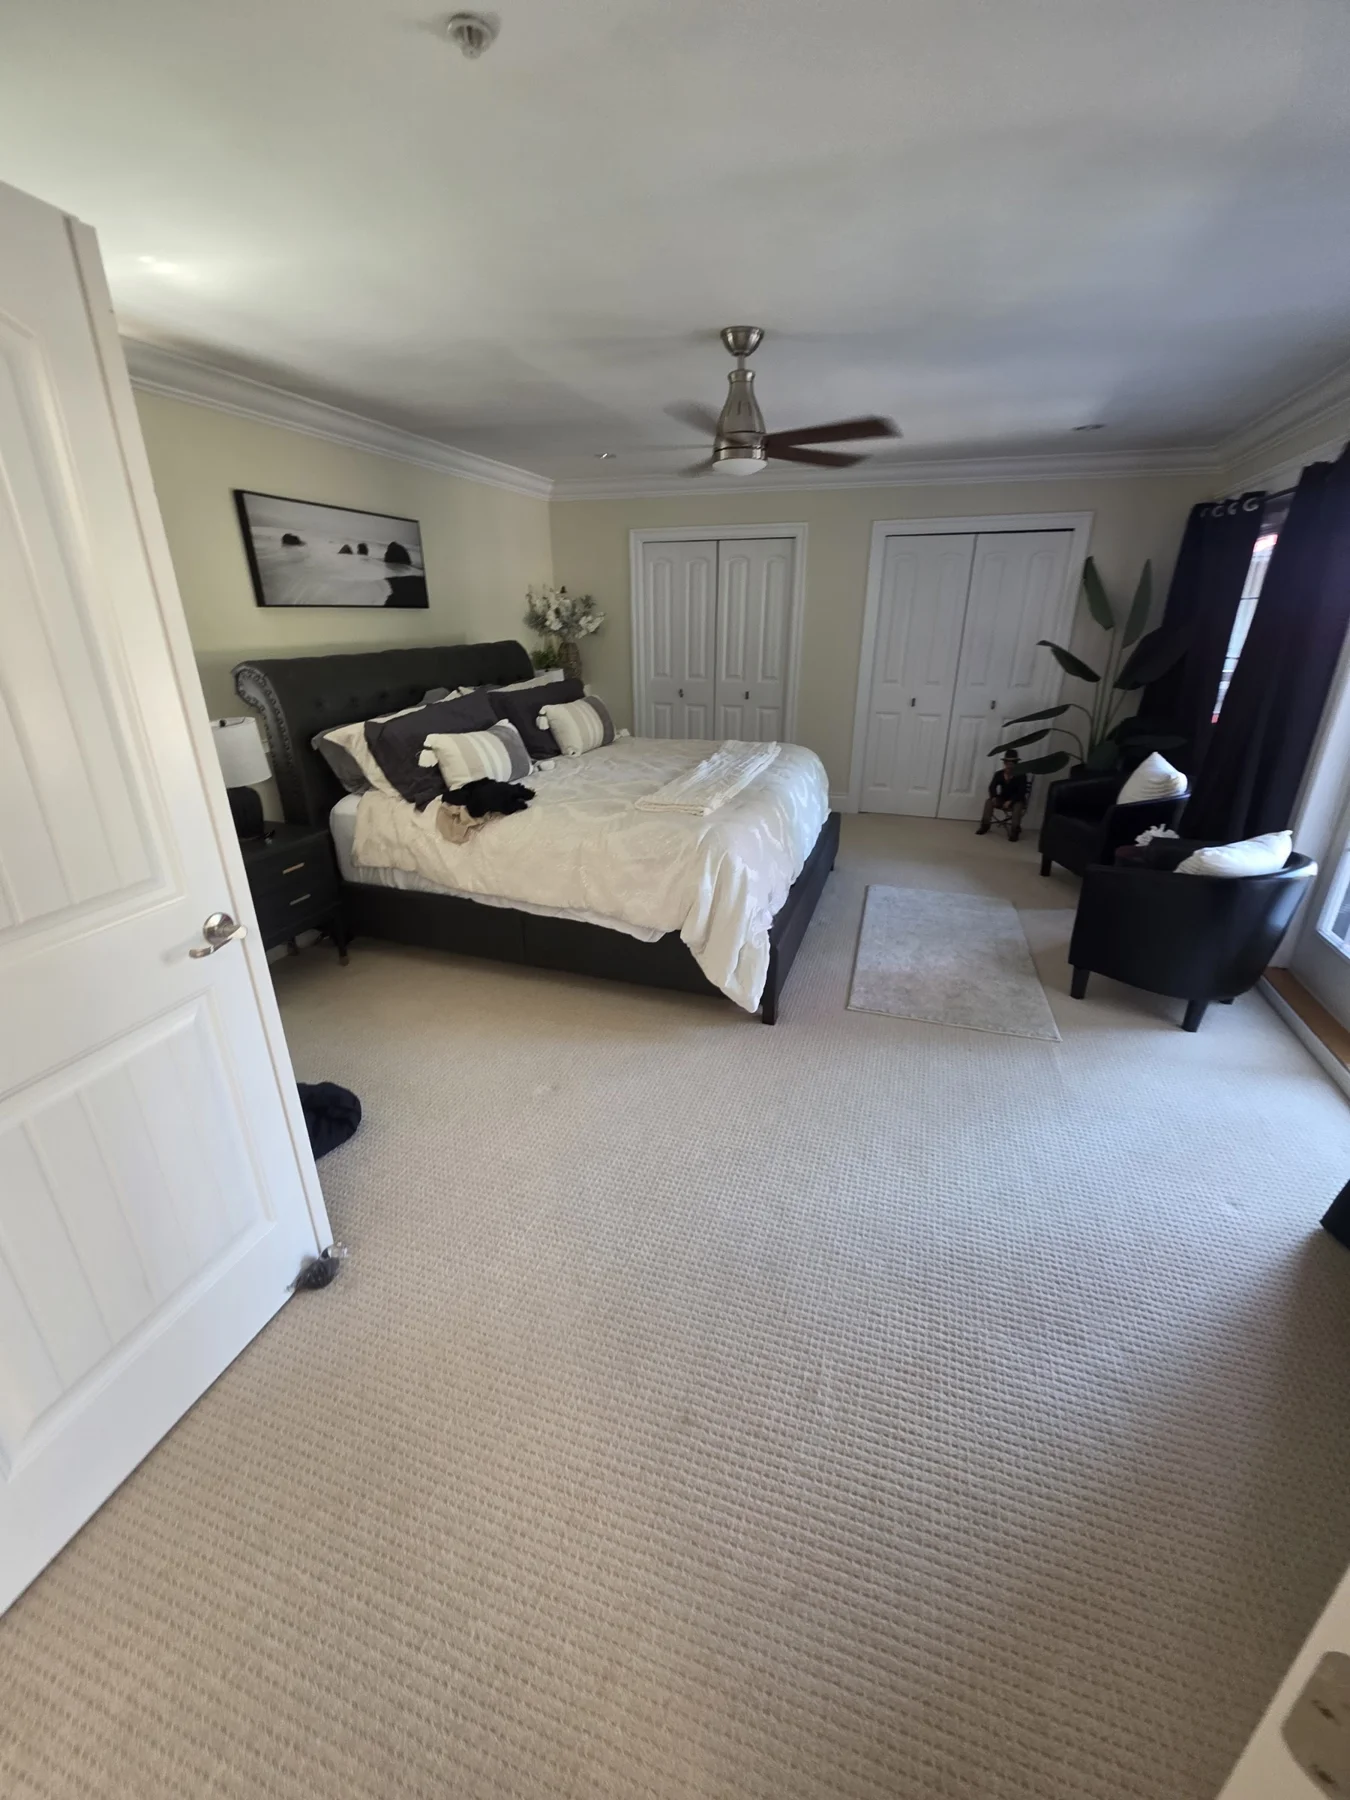
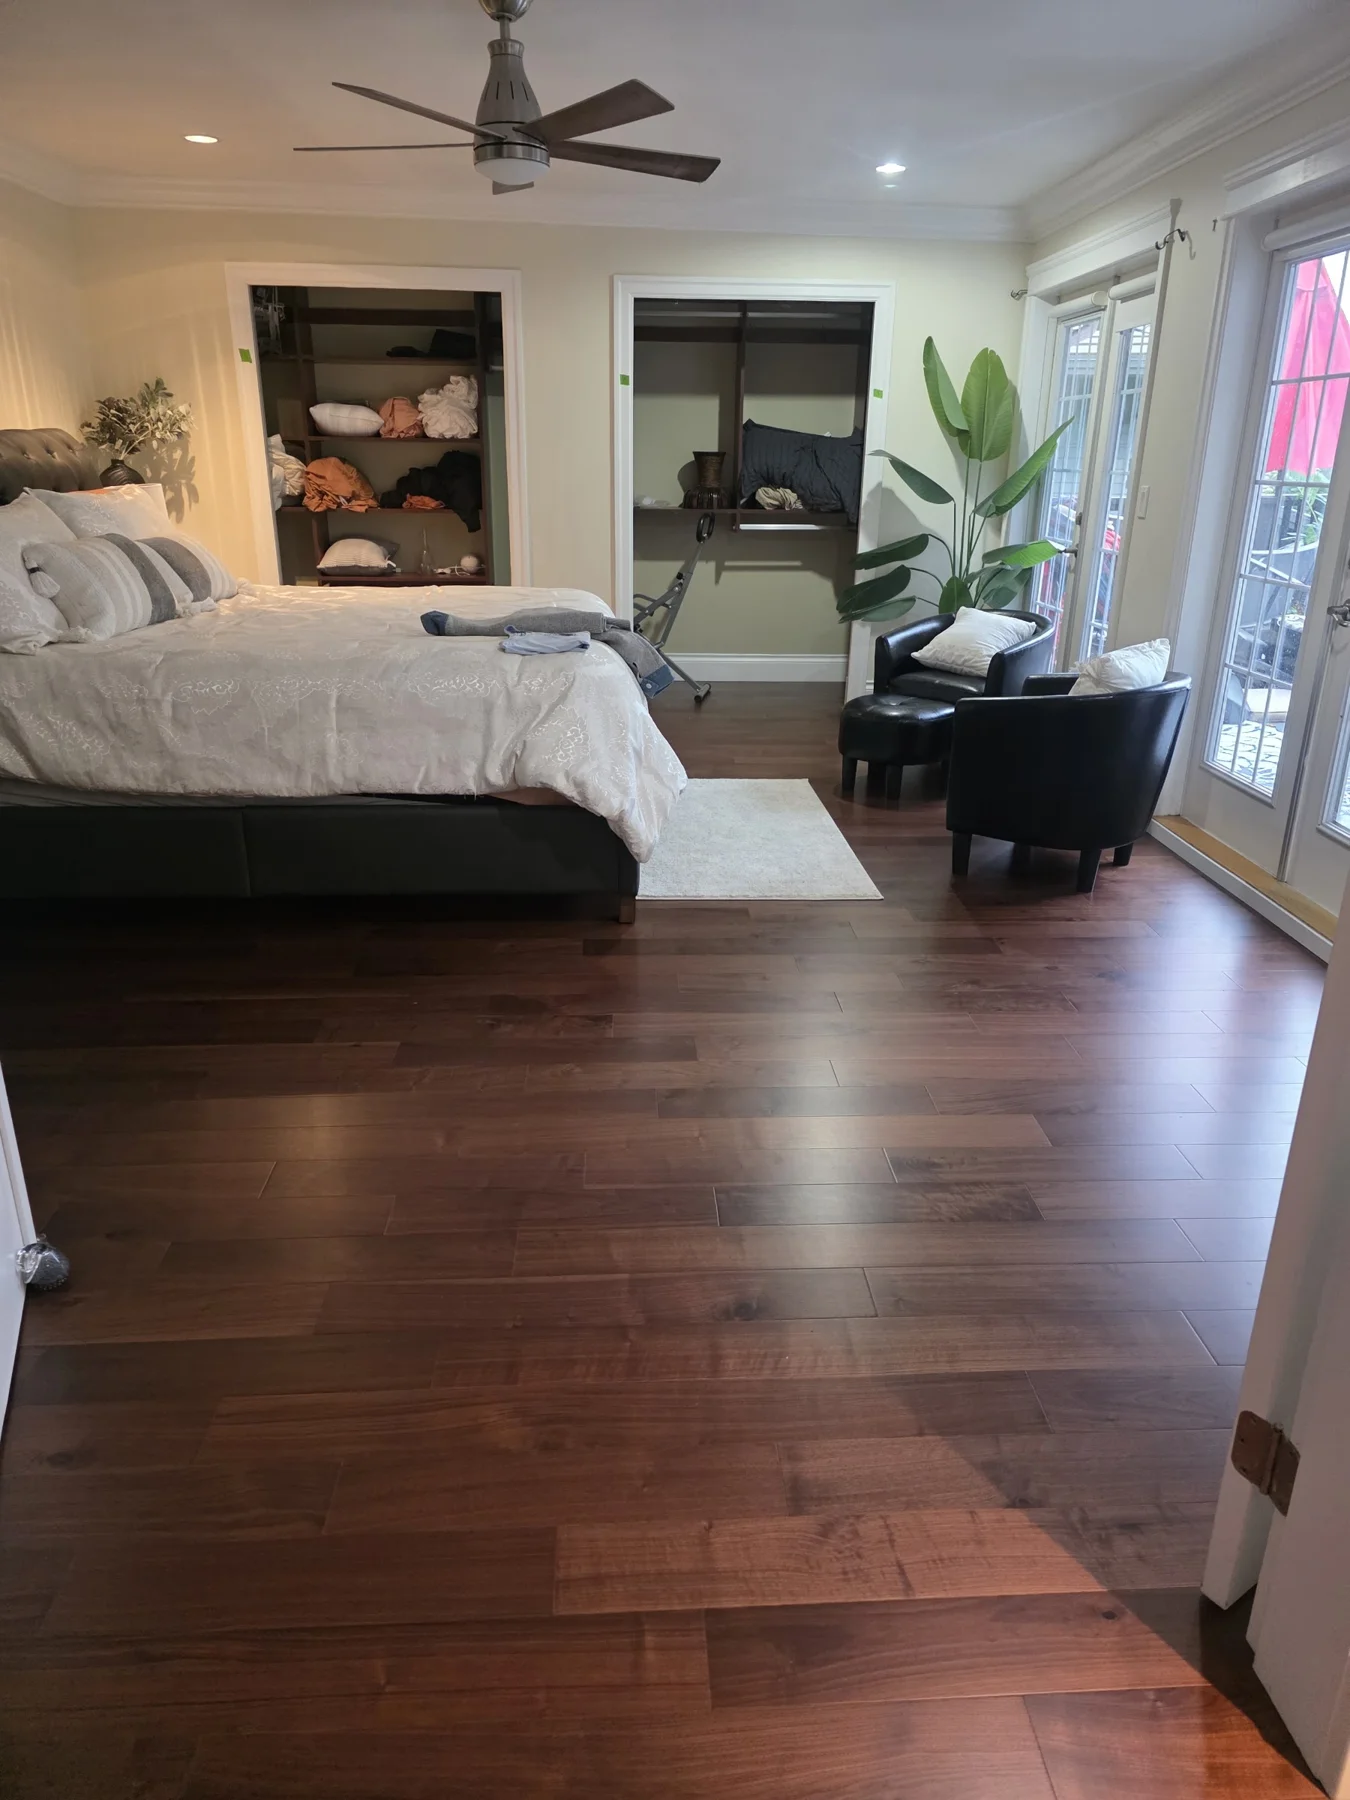
Carpet out.
Hardwood in.
Upstairs, the work began with carpet and underlay removal. Preparing the exposed substrate and installing engineered hardwood with full-spread adhesive brought a new finish to the bedrooms and landing.
BEFORE · MASTER BEDROOM
AFTER · MASTER BEDROOM
03 / THE LANDING · HANDRAILS & NOSINGS
Bring the pieces
together.
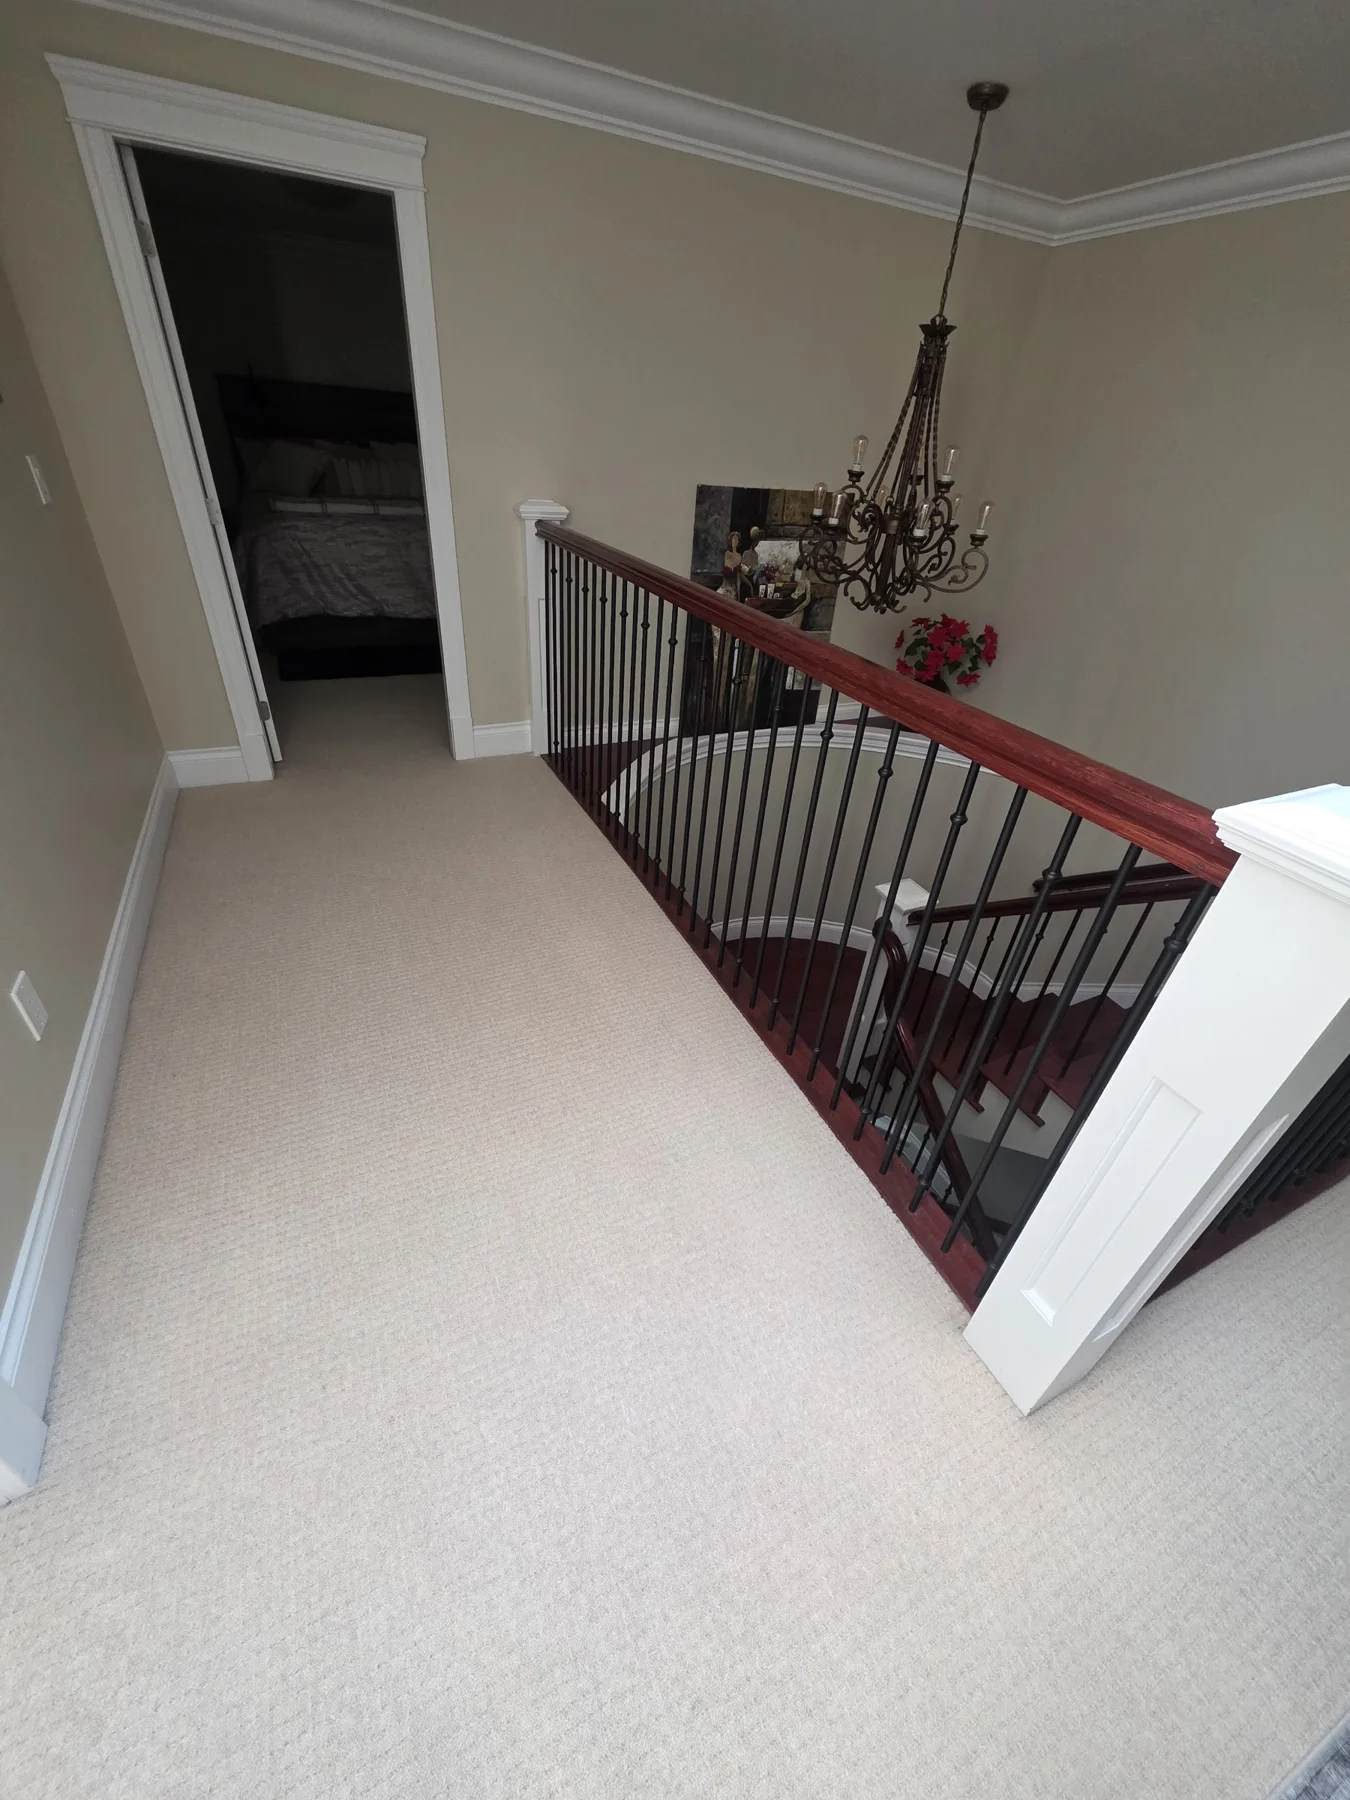
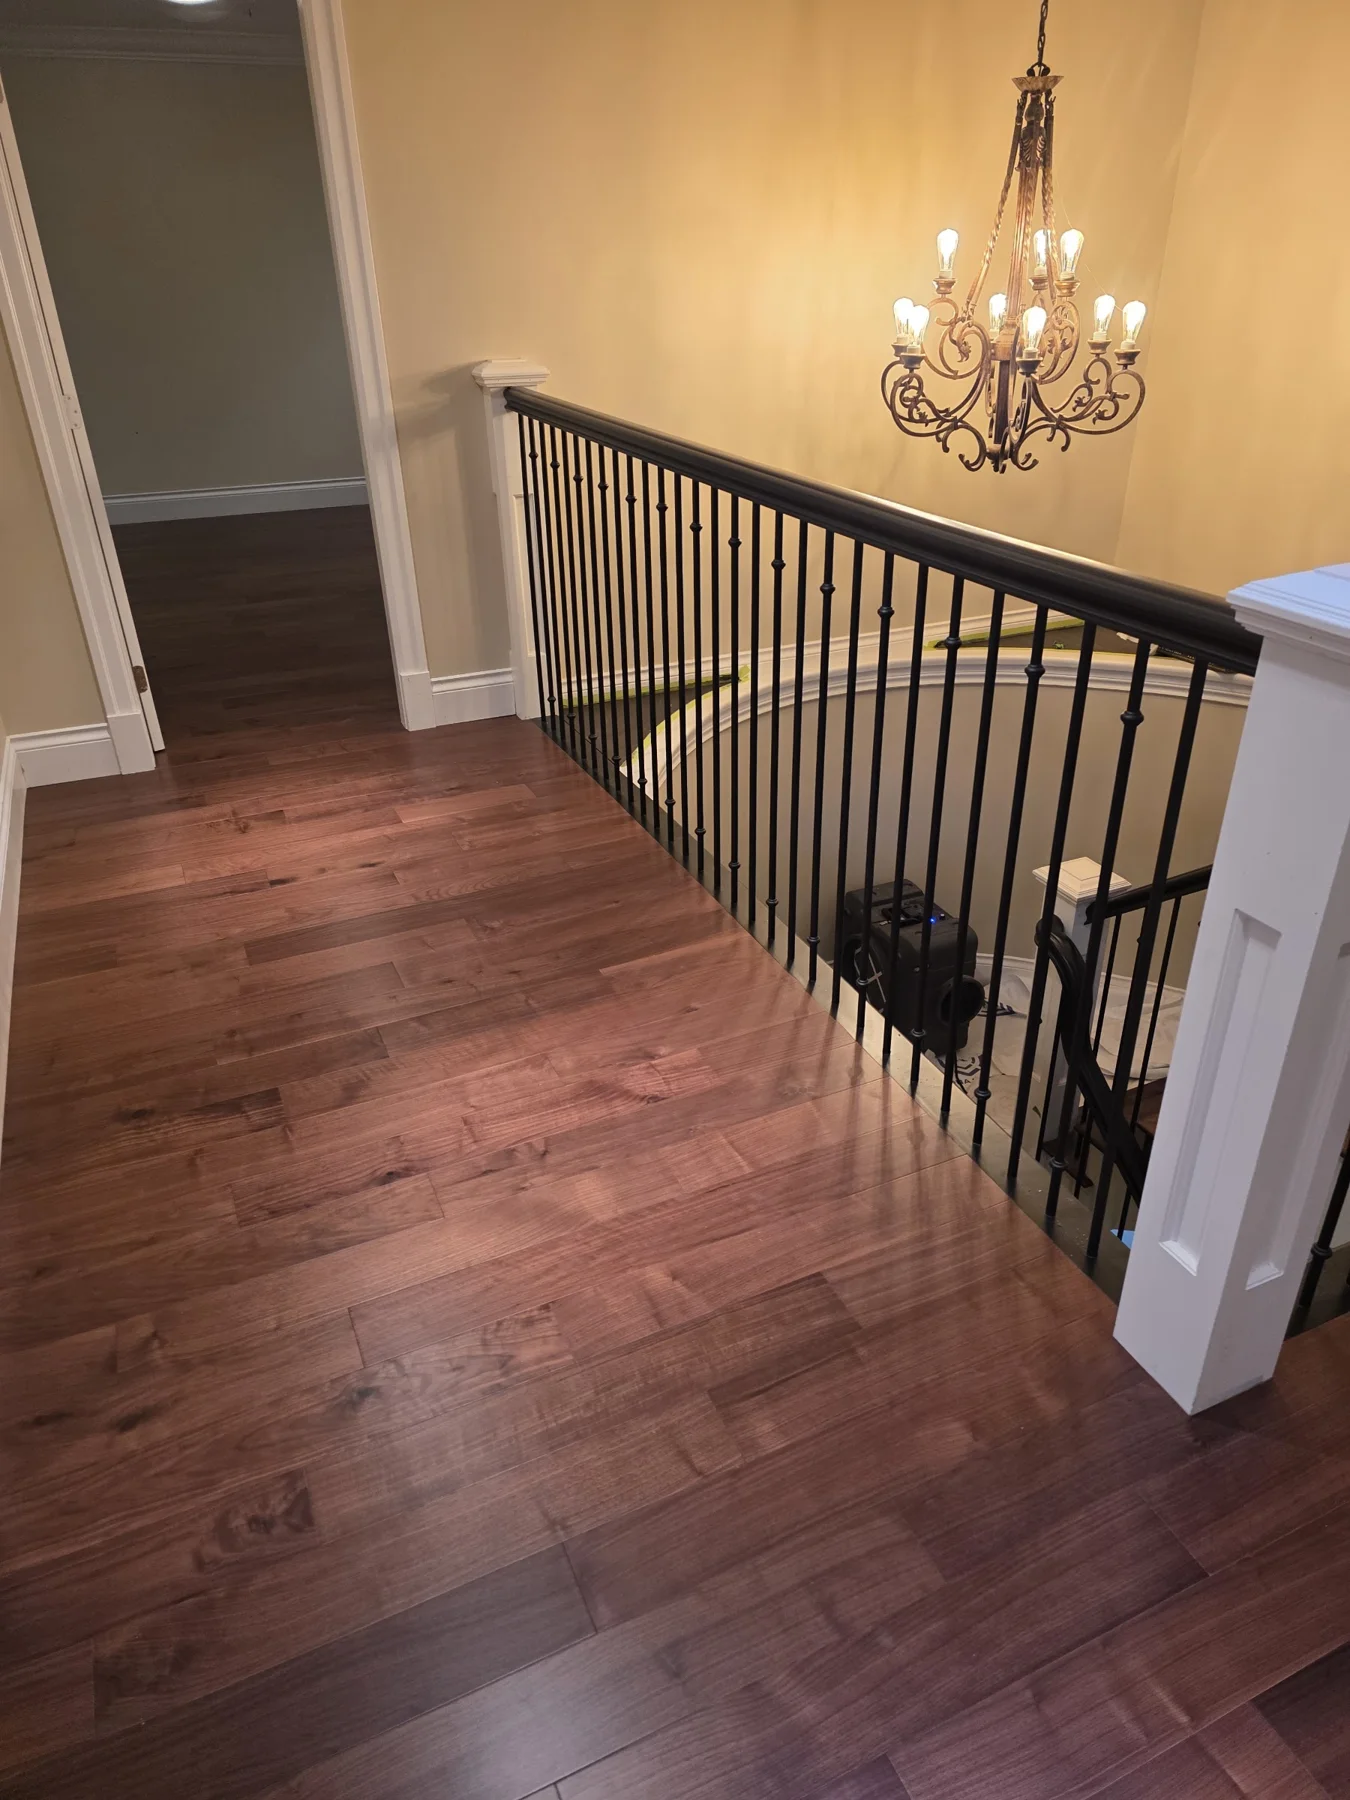
We handled handrail removal, restaining and reinstallation, as well as nosing staining. Coordinating that work with the new upstairs floor brought the landing, stair edges and handrail into the same darker colour direction.
BEFORE · UPSTAIRS LANDING
AFTER · UPSTAIRS LANDING
BEHIND THE FINISHED FLOOR
The preparation
behind the transformation.
Laser assessment, mechanical grinding, controlled leveling and preparation for staining shaped the work. Explore the photographs and decisions behind the finished rooms.
Explore the preparation and finishing details
04 / BENEATH THE FLOOR · PREPARATION
The result starts
below the boards.
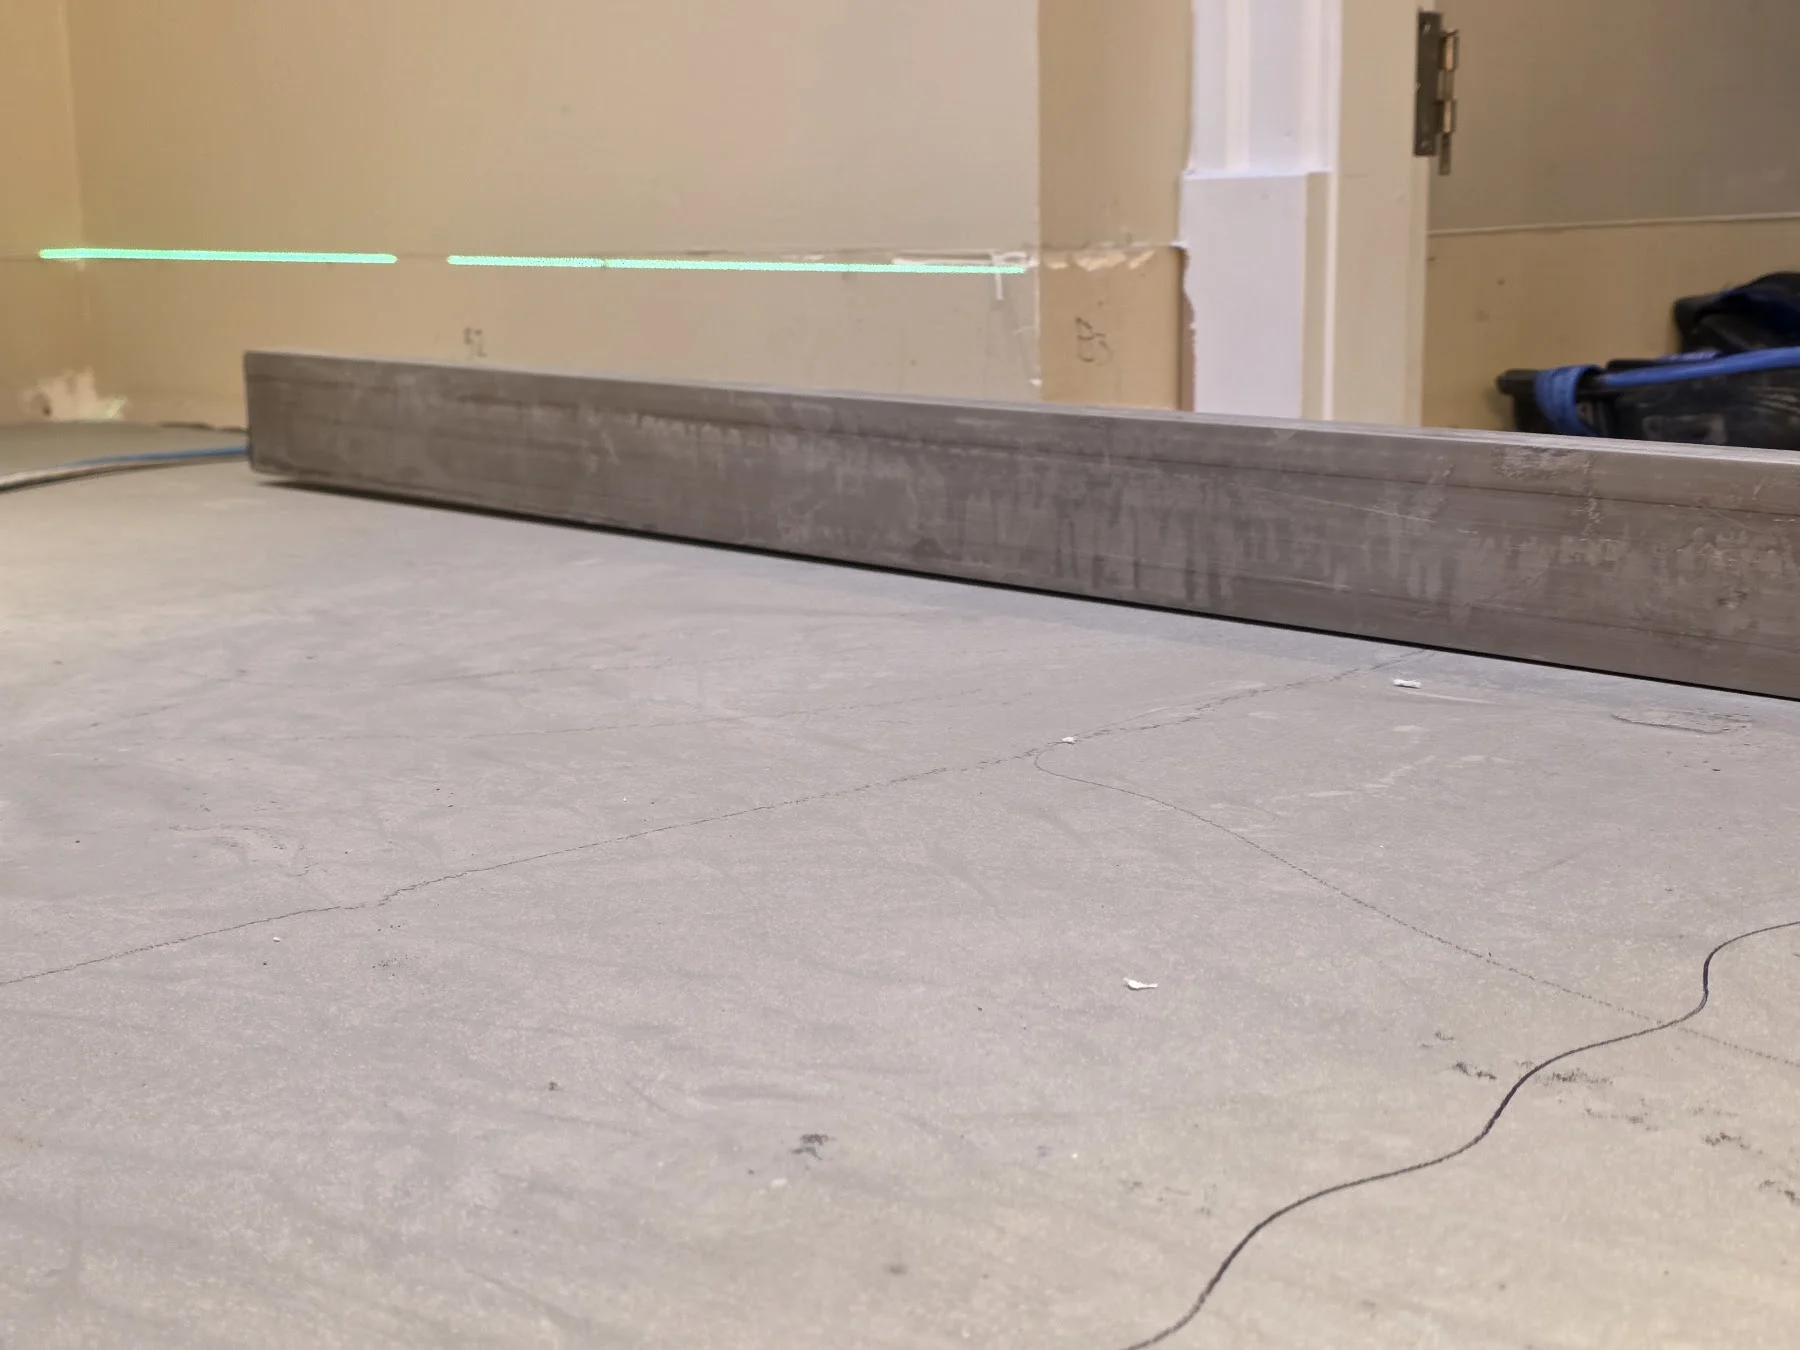
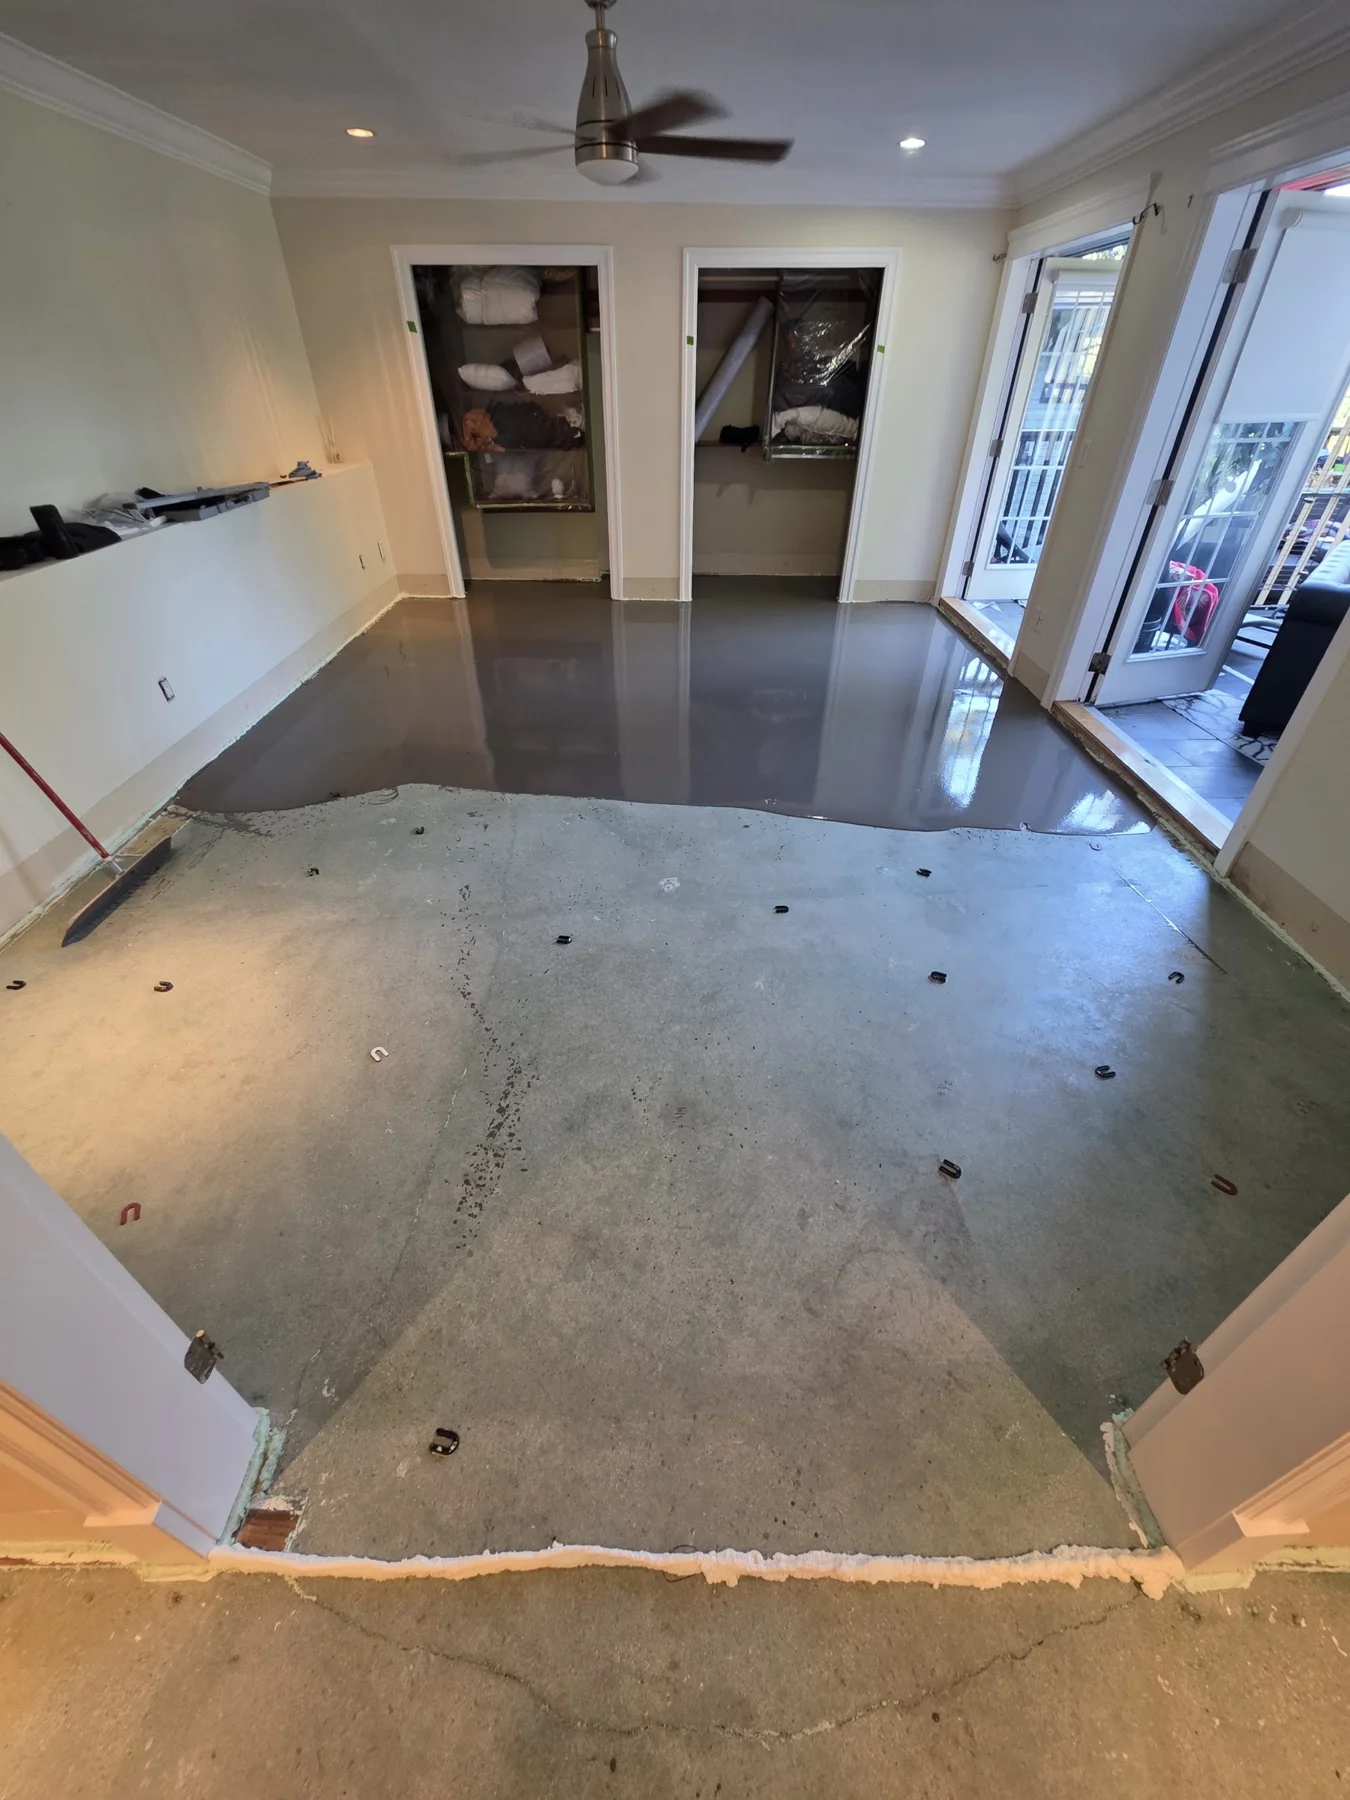
The finished rooms tell only part of the story. Laser and straightedge checks helped map the uneven substrate upstairs, informing where to grind high areas and build up low areas before installation.
WHY THE PREPARATION MATTERS
Flatness, with the
whole home in mind.
Flooding everything to the highest point would have affected the surrounding transitions. The preparation plan instead combined mechanical grinding with controlled pours, accounting for both local unevenness and the different elevations between rooms.
UPSTAIRS · GLUE-DOWN INSTALLATION
Prepared below.
Bonded above.
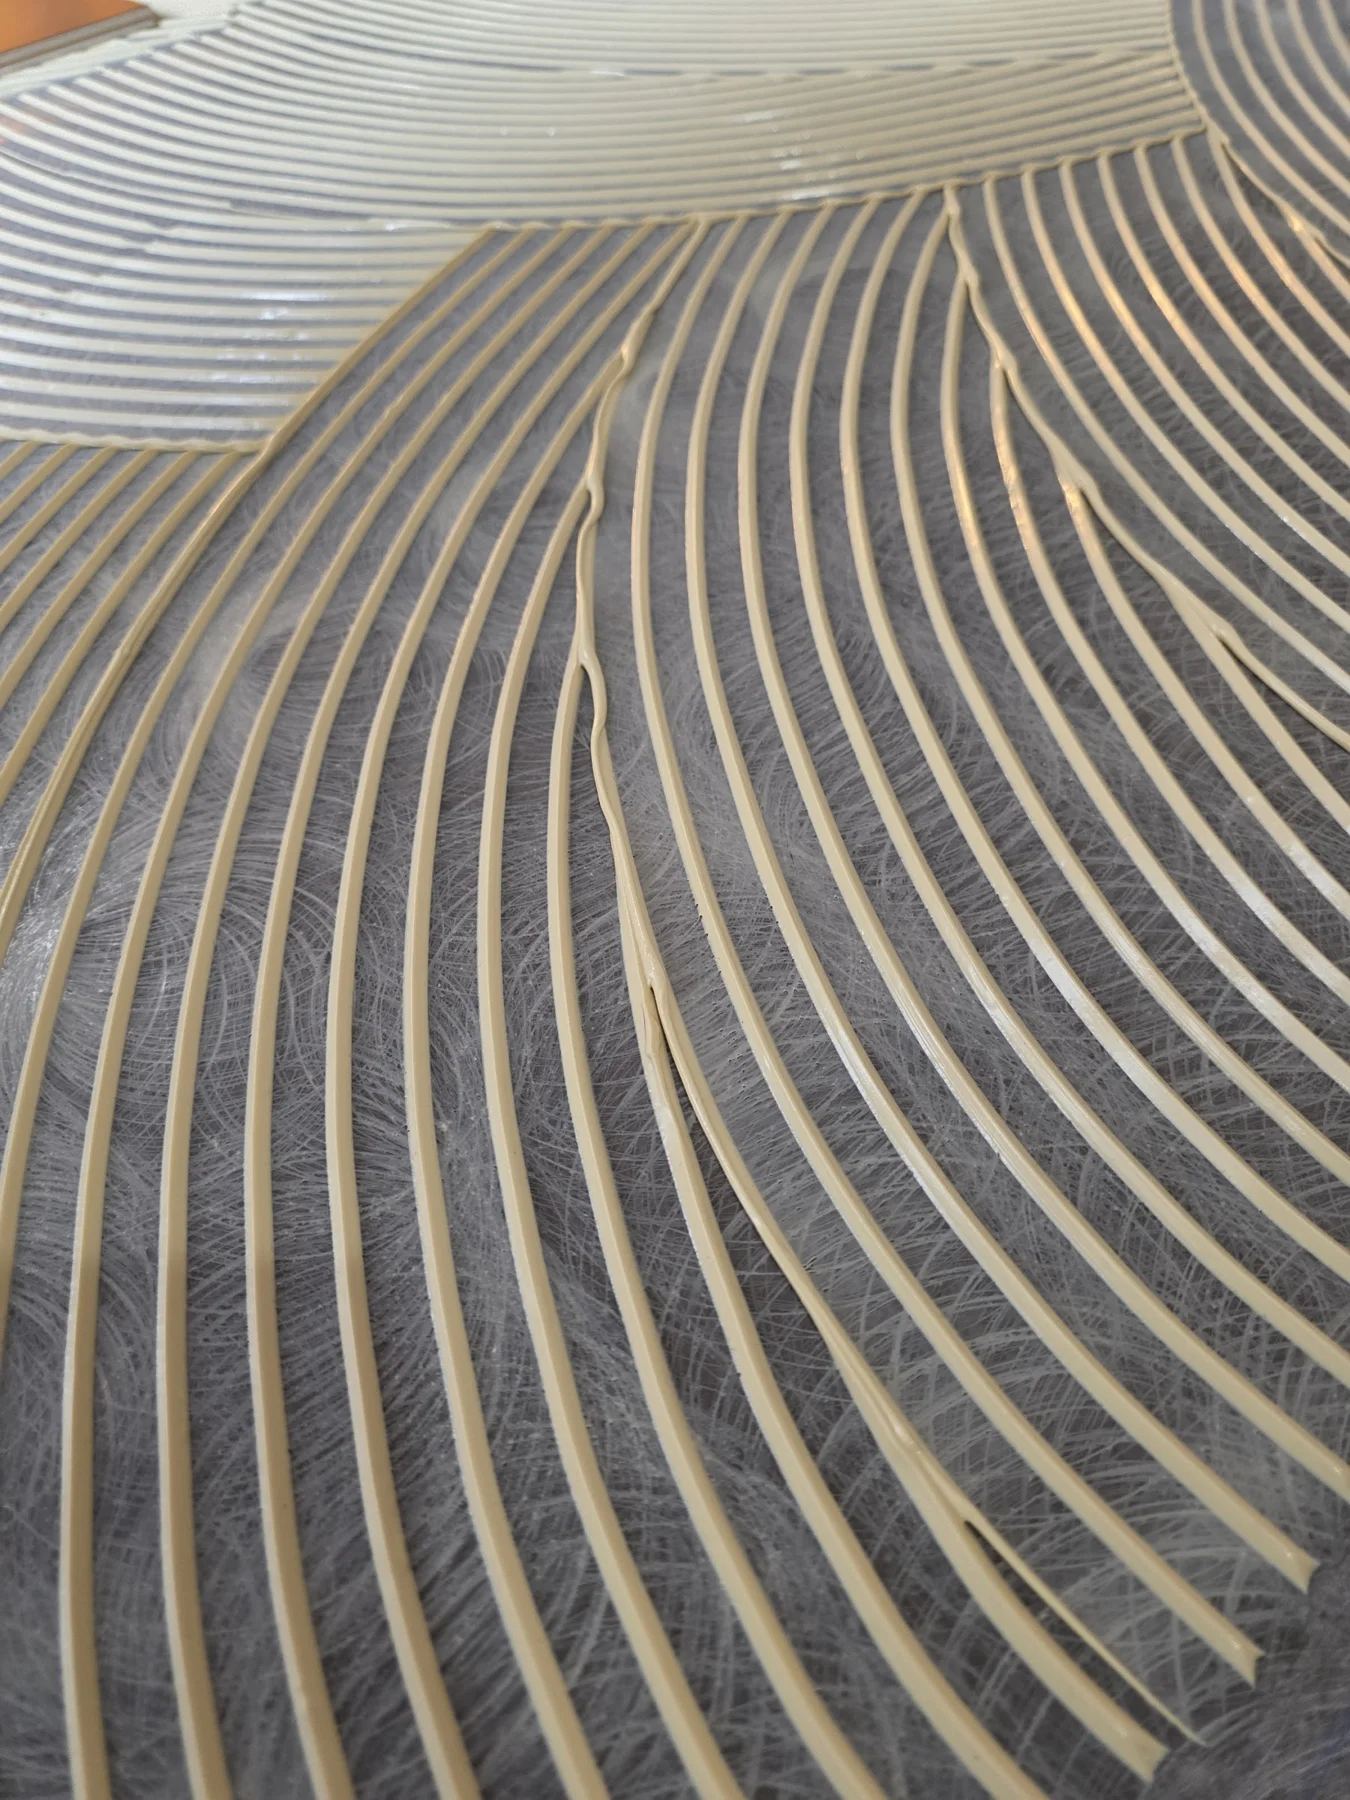
The grinding marks remain visible beside the adhesive. This close-up shows the preparation beneath the new engineered hardwood, just before the next boards are laid.
NOSING STAIN PREPARATION
Protect the surroundings.
Focus on the finish.
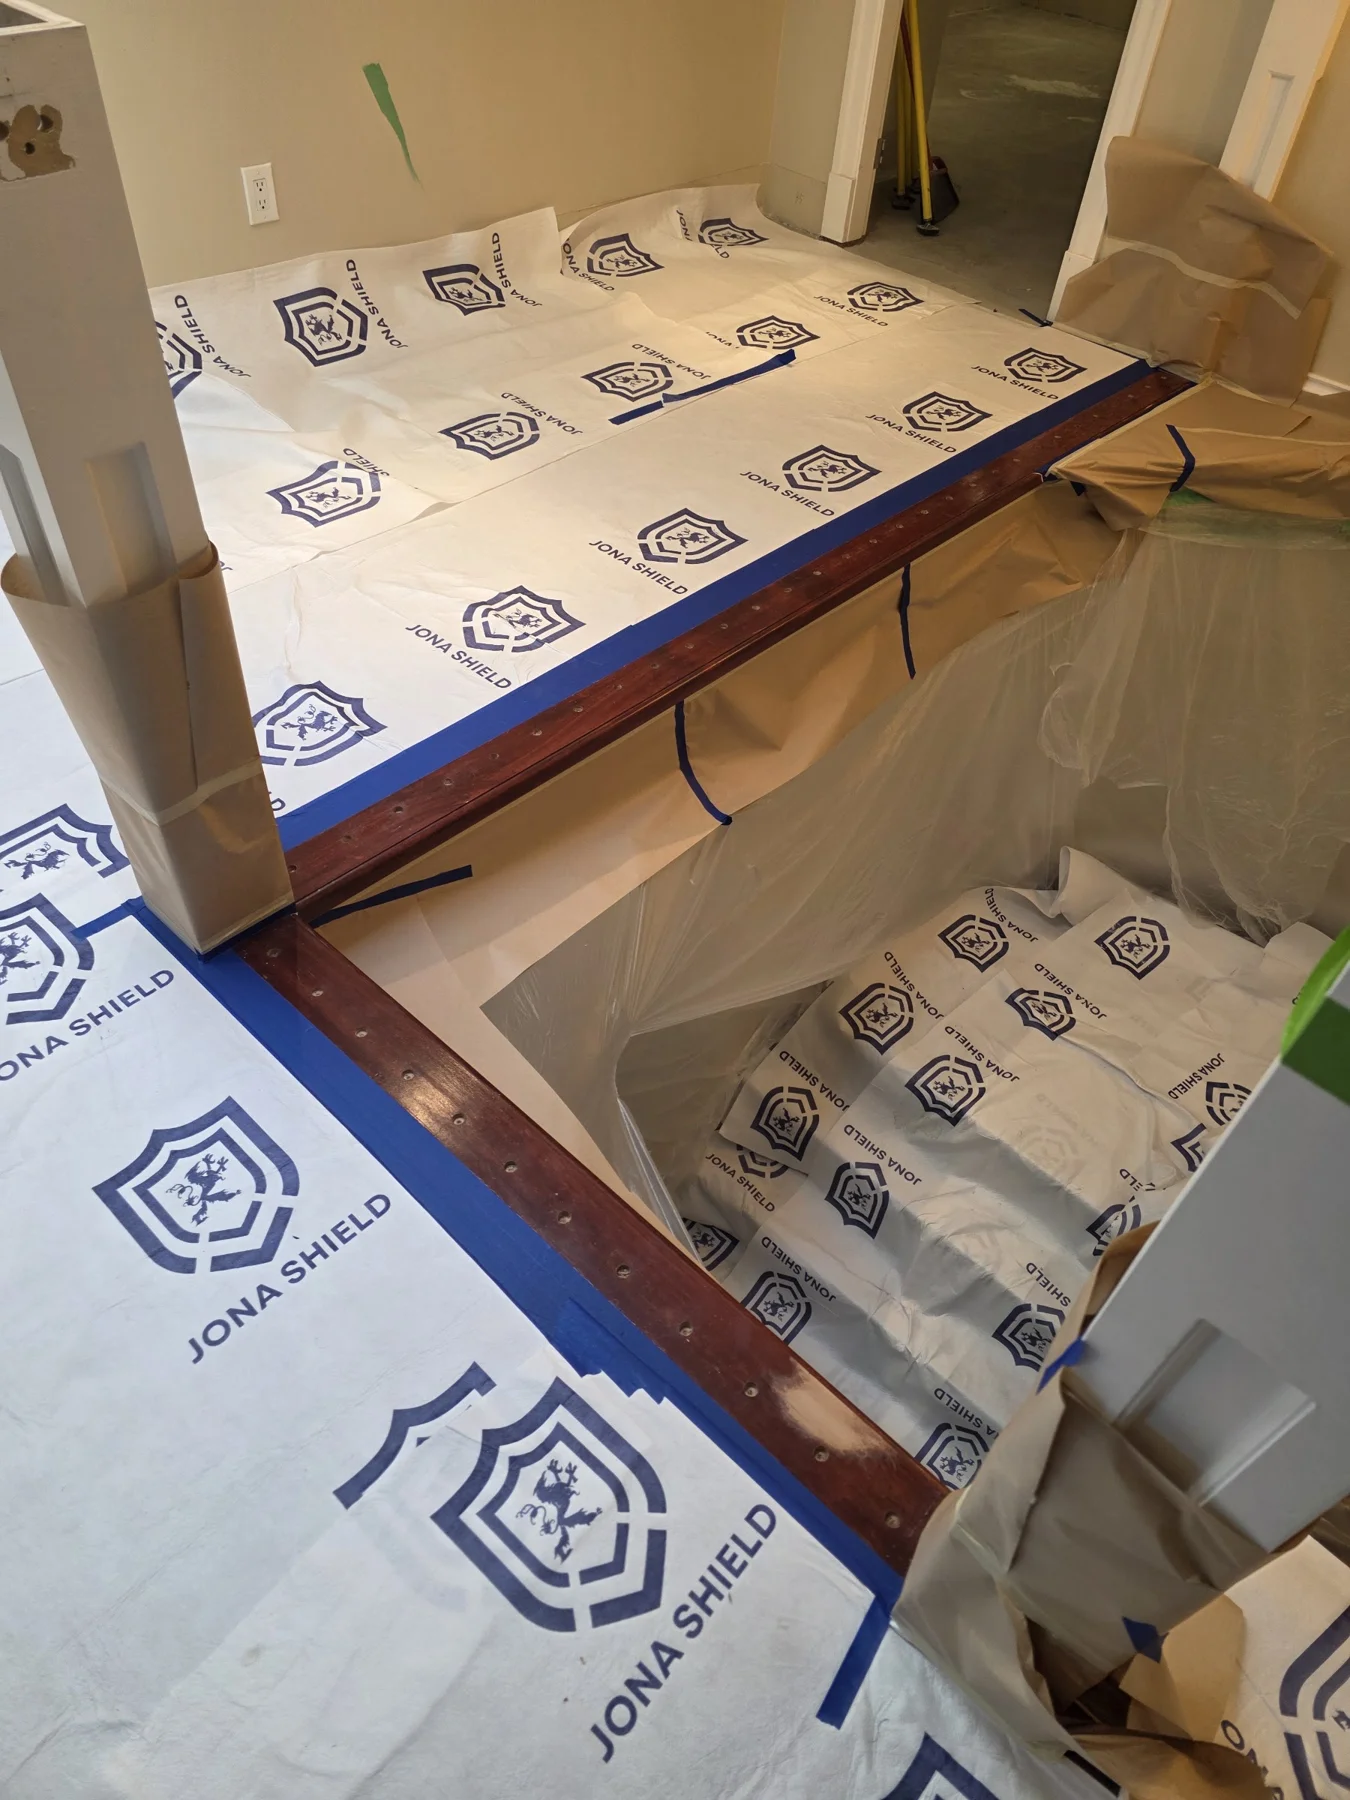
Masking isolates the exposed wood at the stair opening while protecting the surrounding flooring and staircase during the staining work.
YOUR HOME, NEXT
See the potential.
Plan the details.
Considering refinishing, new hardwood, or a combination of both? We’ll help you assess the existing floors and the preparation your project needs.
Request an estimate ↗